

I’m ready to attach the top to the base finally of my Roubo style workbench. This is based on the one in Chris Schwarz’s book. I’m making it out of hard maple. Most of the techniques I’m using are new to me, so I’m learning a lot, and it is a lot of fun too.
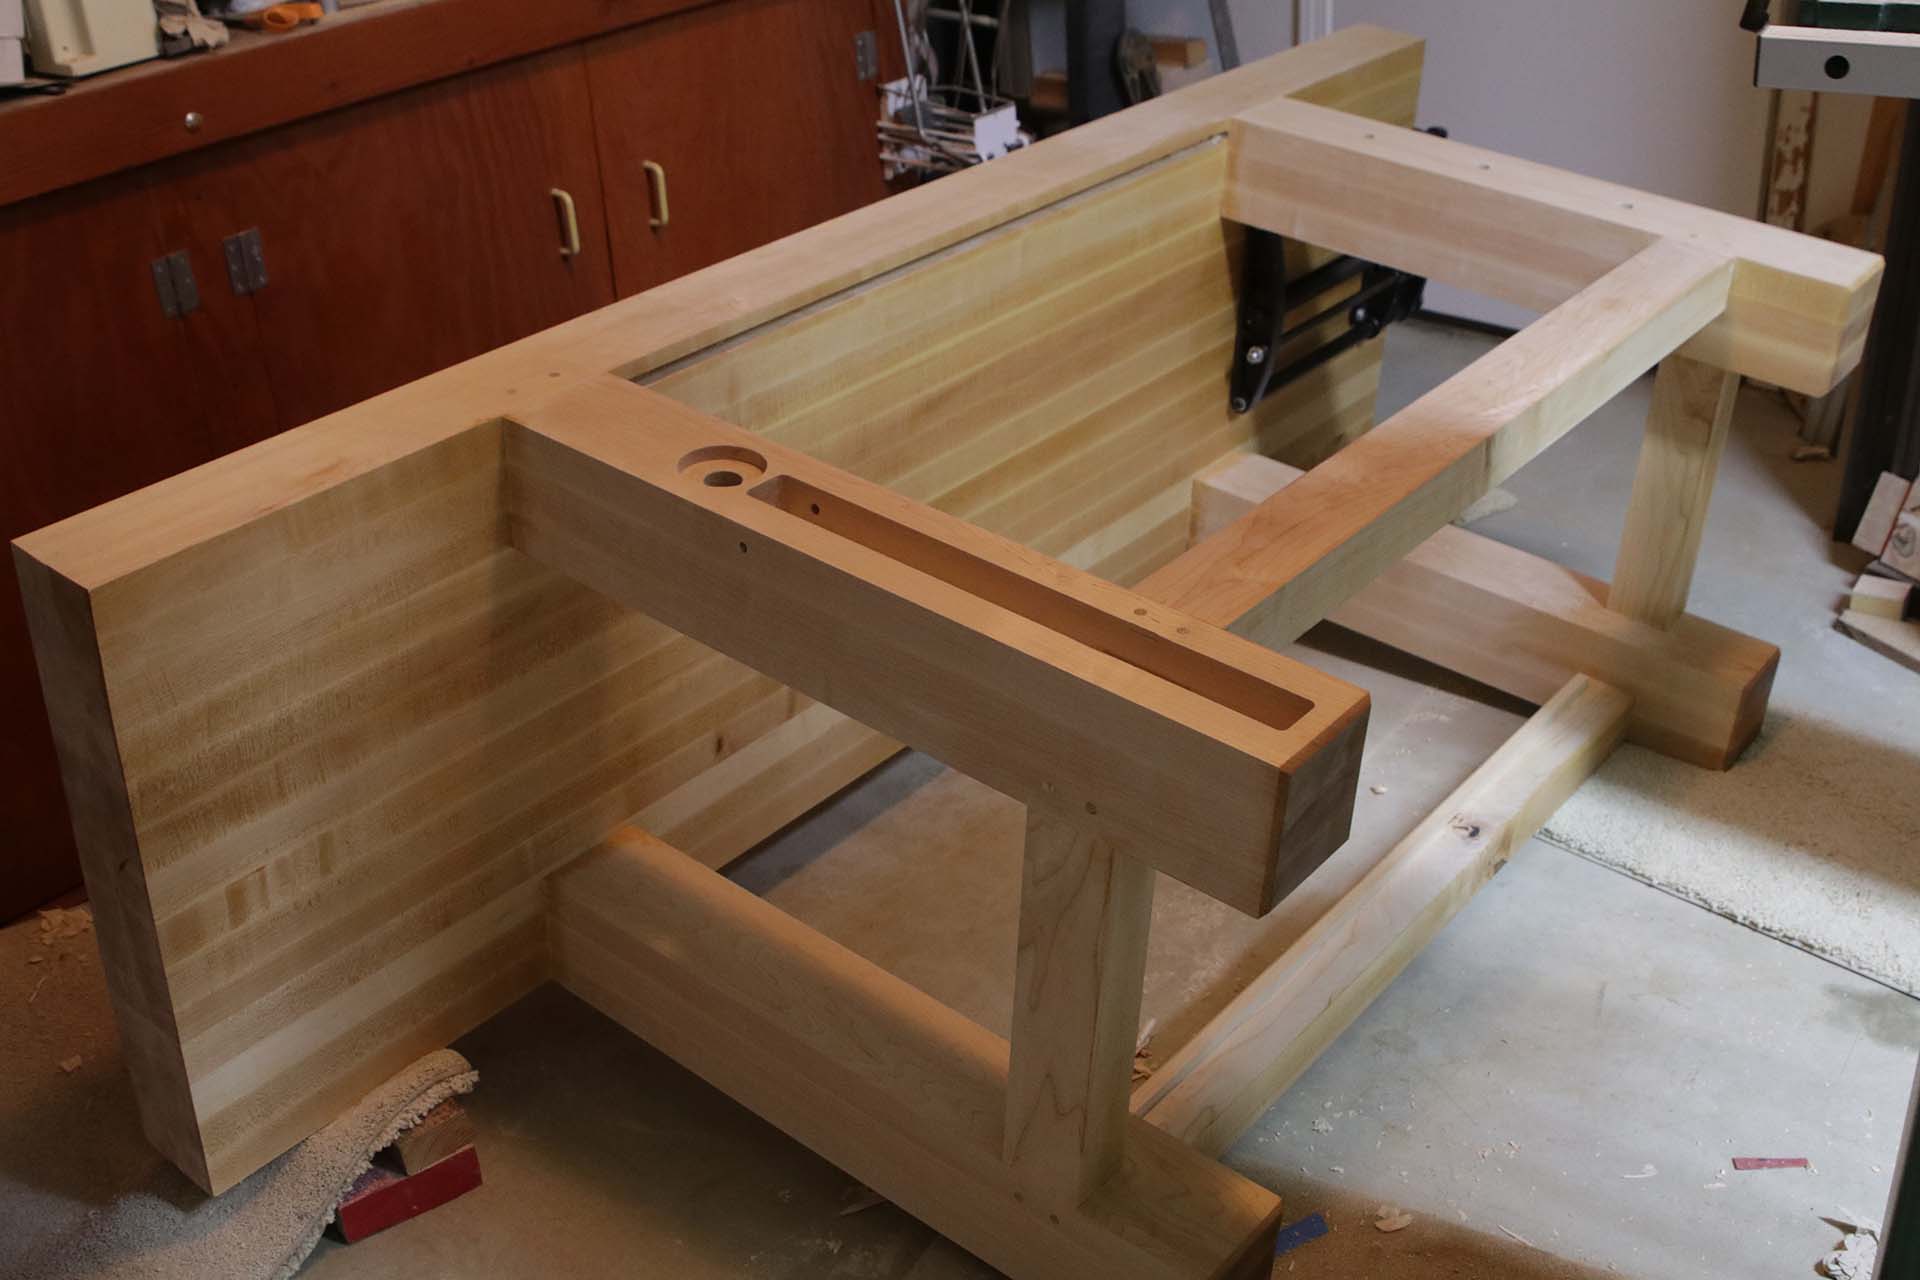
I started by making the slot in front of the workbench for the sliding deadman. This goes just between the two front legs. I used my router with its fence, and the half inch upcut spiral bit. I had to make two passes to get to the 5/8″ wide slot. I also made several passes a little deeper each time, and didn’t try to remove the entire inch of material at once.
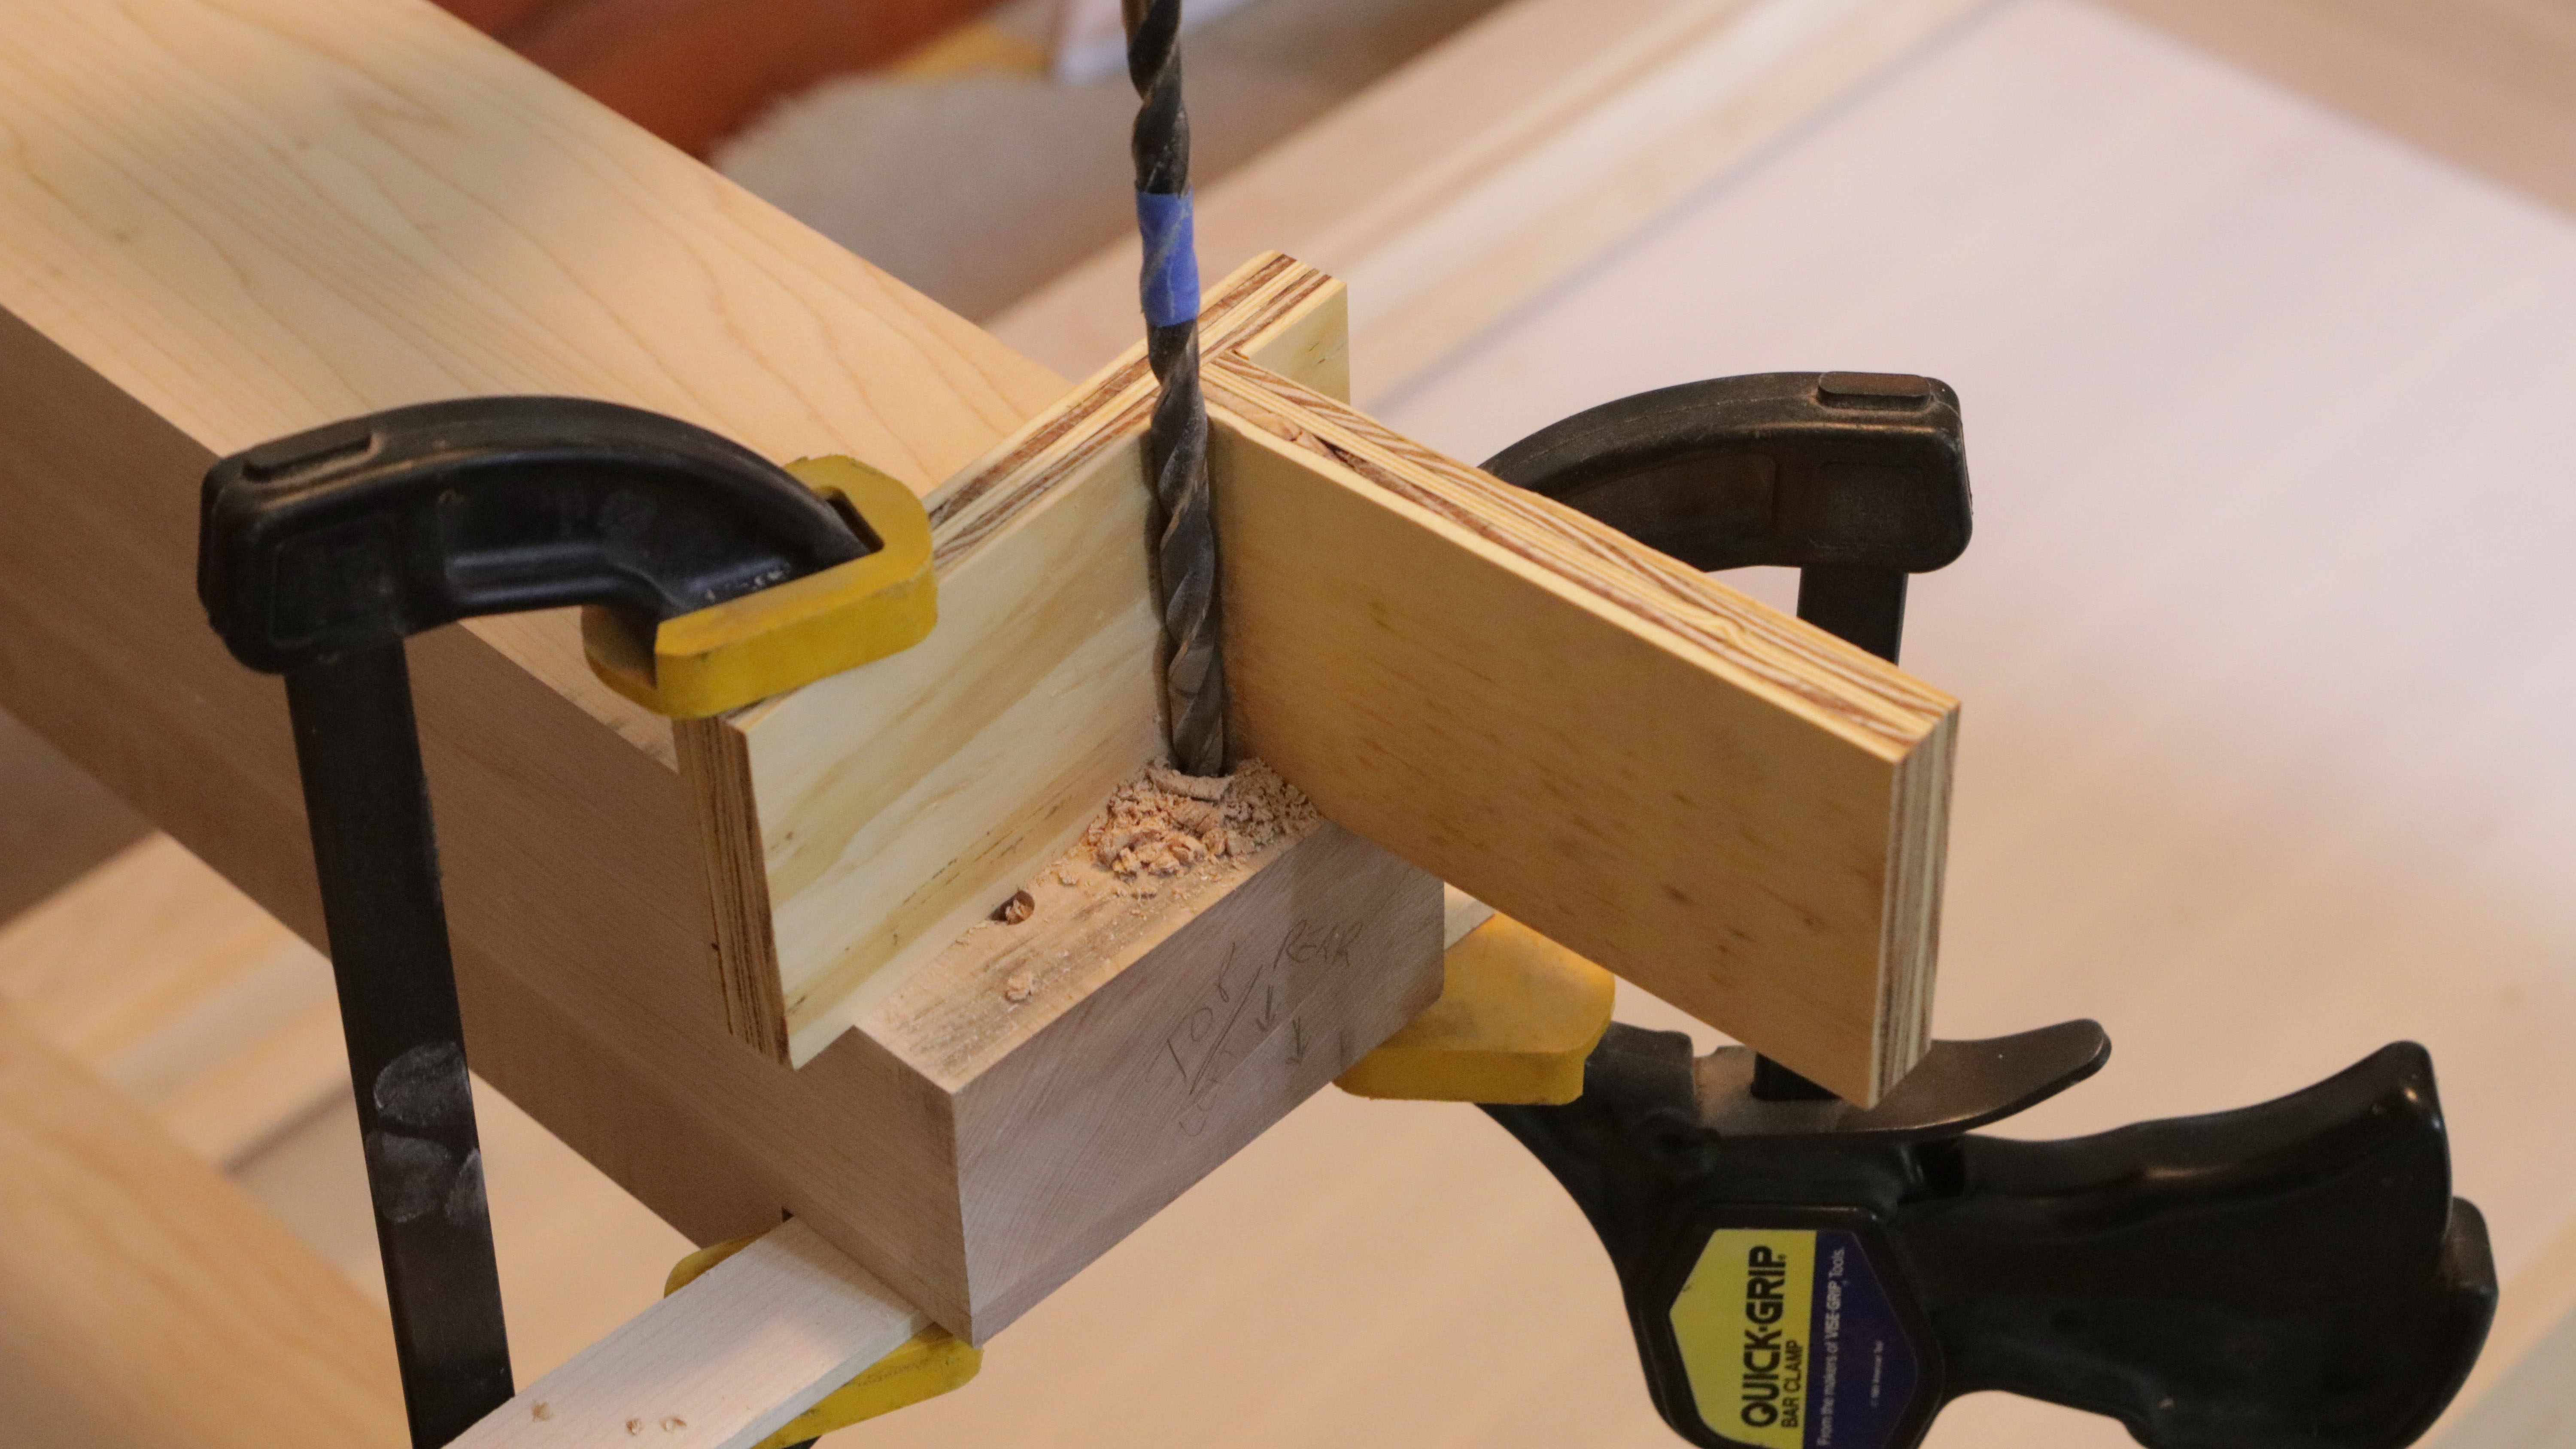
I drilled out the dowel holes in the top, two holes for each leg, going 6″ deep. Those are some long dowels. The dowels are 3/8″ white oak I made with the dowel plate by hand, pounding through the rectangular strips of oak through the round holes in the plate. I kept going until I had eight 6″ dowels. A lot of times these will crack and break, so I made sure and cut a few spares with the bandsaw.

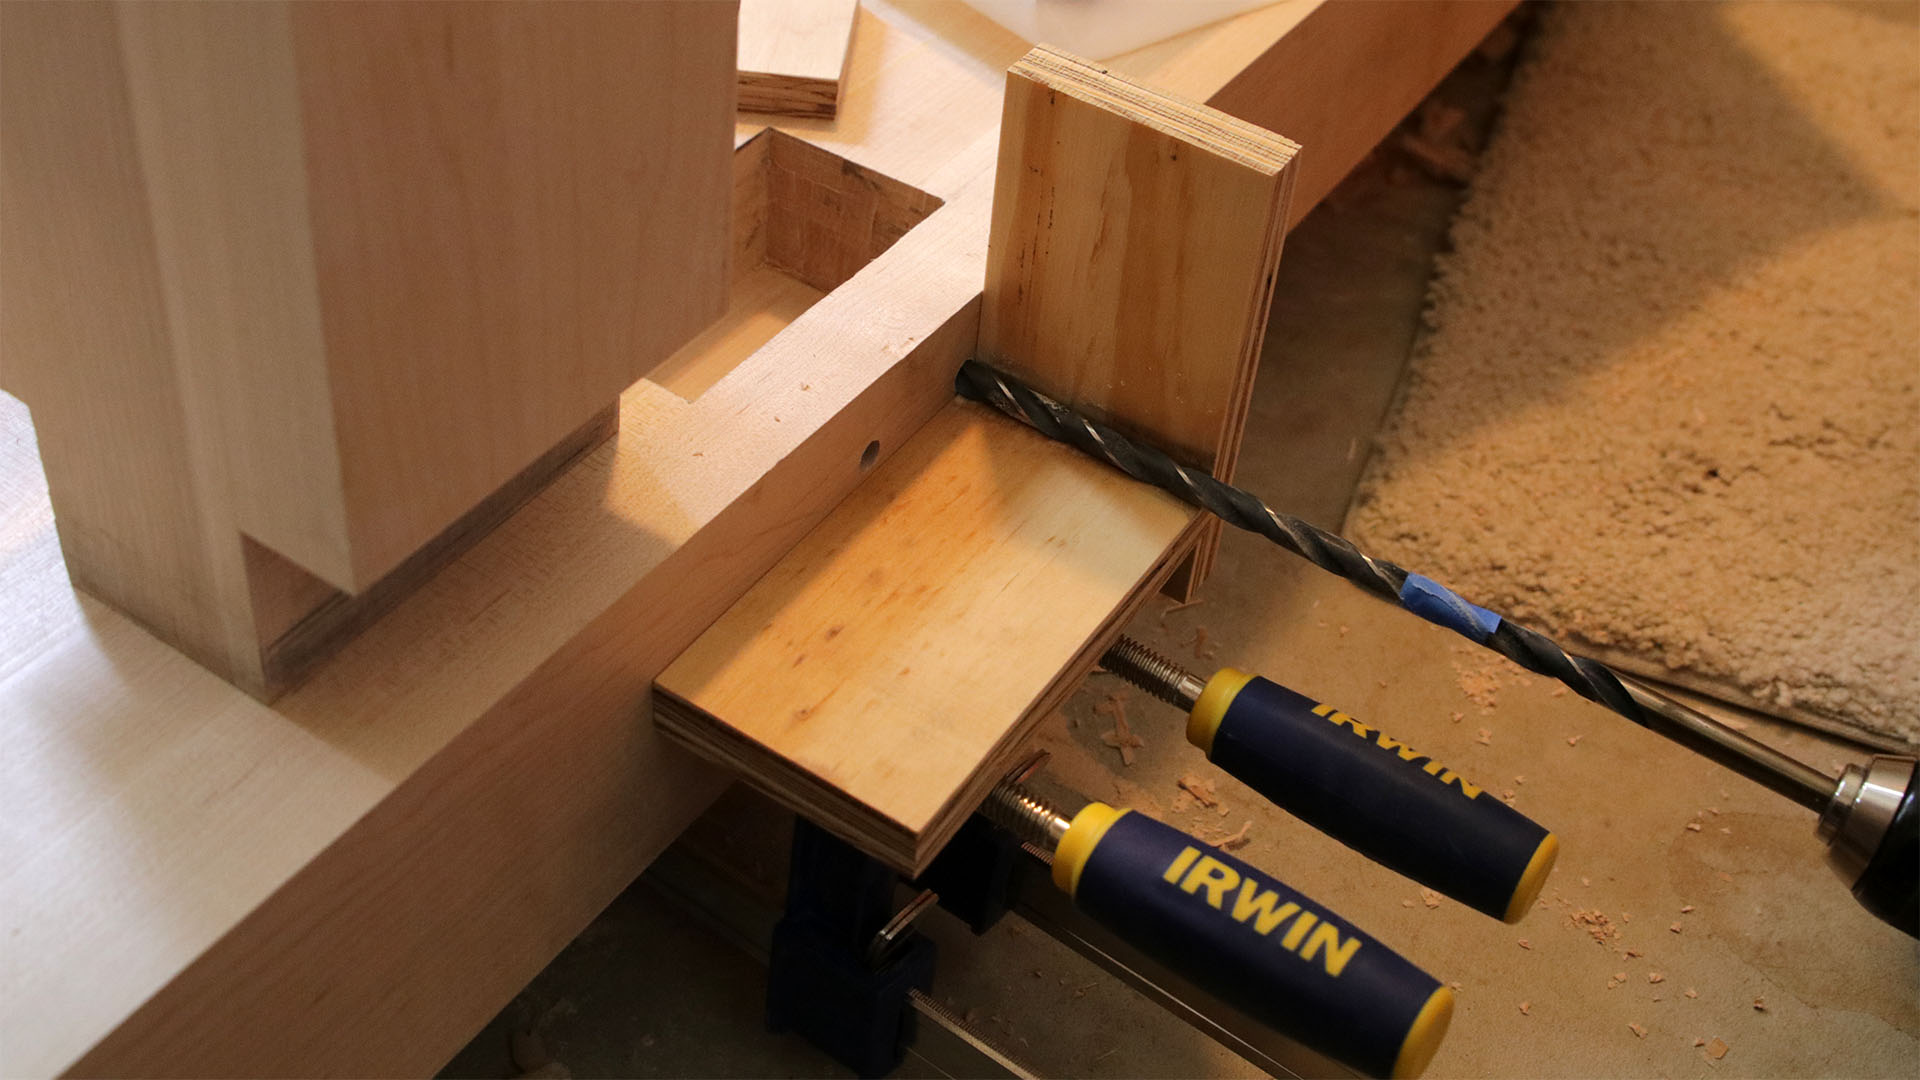
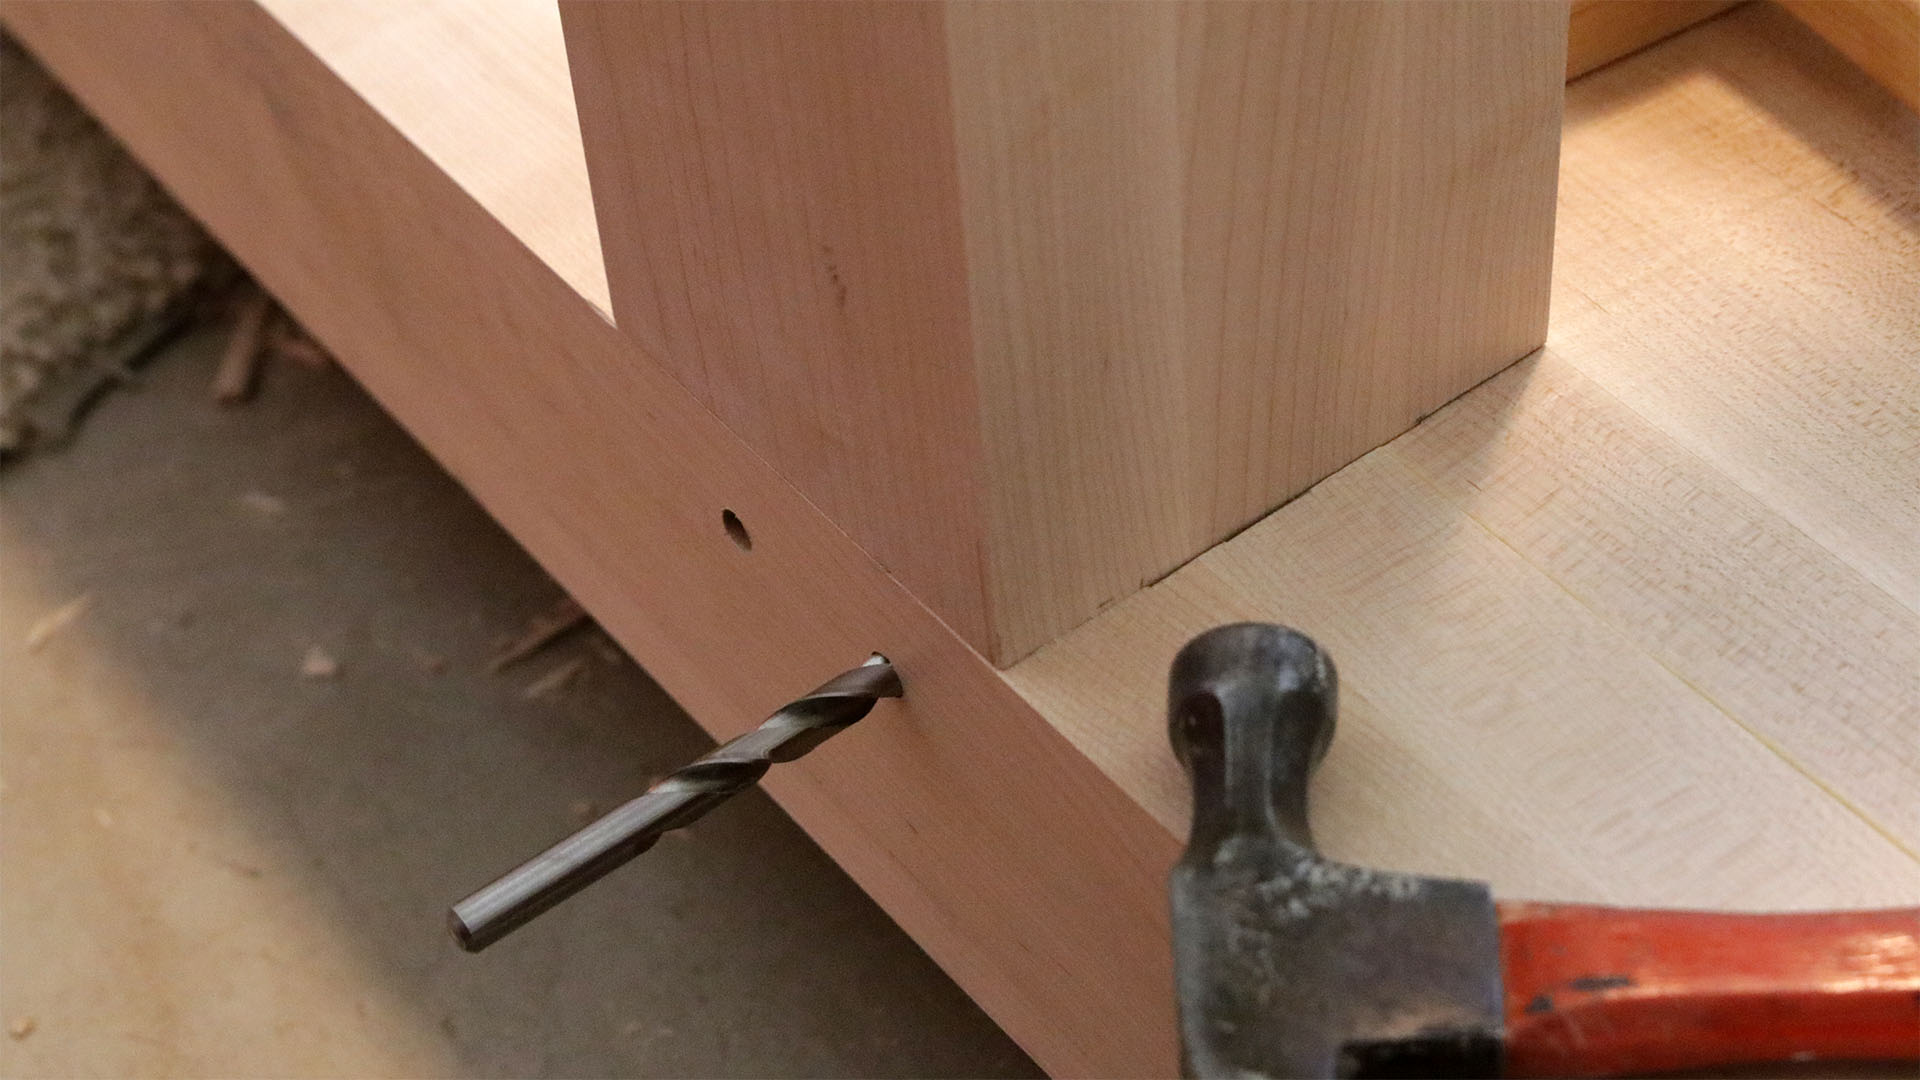
Drilling the holes in the leg tenons happens by first marking each tenon by insterting the base into the top, making sure the legs are all seated. Then I took a 3/8″ brad point bit, with its sharp center, and marked the exact center of all 8 dowels holes. I removed the base and turned it on its side, then prepared to drill out the dowel holes in the tenons. To drawbore a dowel, I need to move the actual hole I drill away from the tenon, towards the leg, about 1/16″ away from the brad point mark. When pounding in the dowels, this will cause the dowel to bend around each tenon, putting pressure on the legs to keep them in the top.
At this point, I was ready to glue the top to the base. I taped thin cardboard to the underside of the top, and sat the base on top of these. When I spread glue on the tenons, this would keep glue off the workbench top. I filled my glue bottle with glue, and got everything ready, my dowels, 3lb hammer for the dowels, clamps, etc. I started brushing on the glue, to both the tenons and mortises, I wanted to make sure everything had plenty of glue. When I was done with all four legs, I lifted up one end of the base slightly, and dragged it over to the mortises, and it dropped in. The fit was tighter with the glue, and I ended up needing clamps to pull the base into the top all the way. After that I wiped off the excess glue.
I wanted the bench ready to be turned over, and was trying to do every possible to make it easier to work on. So after the glue dried, I was getting everything done now that I could, that would be more difficult to work on after the bench was upright. I started by chiseling off the excess glue around the legs, very carefully using the chisel, so to remove glue, but not wood. I also sanded after that to clean the wood up.
I went ahead and put on a couple coats of boiled lindseed oil to the bottom of the bench, and to the bottom of the legs, and the underside of the stretchers. I waited a couple days in between coats for it to dry well. It probably is drying slowly, it is cold out in the shop this time of year.
I am using the Veritas Front Vise as a side vise. It sounds funny I guess, but the vise will enable me to make a wooden jaw with dog holes, that will line up with dog holes I put in the top. I drilled the necessary holes for that in one end. The vise ends up going between the legs, as it needs 18″ of space to fit, and it is 12″ wide. It is about 14″ wide between the legs. I went ahead and got that vise installed, and the top under the vise already has the boiled lindseed oil finish on it.

After that I was ready to turn the bench upright. It is quite a beast and weighs a lot, maybe around 300 pounds. My neighbor was going to help me lift it upright, but I thought I could turn it on its side, and be ready for him to help. It was all I could do to get it on its side. It took me several attempts to get it there. I guess because that involved lifting part of the top even higher than it was, that caused it to be so difficult to put on its side. The next day, my neighbor came over, and we got it upright for the first time, fairly easy for two people to tilt it up.
I’m going to be working on a short set of two drawers that will go under the bench, on top of the stretchers next. I’ll keep the area directly under the workbench top open, as suggested in Chris Schwarz’s book. He doesn’t recommend drawers, but I’ll try to keep them short. The reasoning is, the underside of the top should be open to allow all kinds of clamping options with whatever you are working on. Once the drawers are done, I’ll be scooting it over to its spot in the shop, which currently still has a lot of maple lumber there. Speaking of scooting – the bench slides easily on the cement floor. The 1/4″ chamfer on the bottoms of each legs keeps the legs from splintering. Anyway, it will be easy enough to move over to it’s final spot in the shop.
Equipment Used:
Spiral Upcut Bit: http://amzn.to/2EUKFtY
Glue: http://amzn.to/2EF0qcl
Glue bottle: http://amzn.to/2FgASiL
Silicone workbench mat: http://amzn.to/2CwWiFl
Silicone glue brush: http://amzn.to/2FhAu3m
Christopher Schwarz book: http://amzn.to/2FdVmbO
3 lb hammer: http://amzn.to/2HukZWx
12″ Drill bit set: http://amzn.to/2EK39y1
Router Bit: http://amzn.to/2E3ja0L
Dowel Plate : http://amzn.to/2ERZNrX
12″ long drill bit set: http://amzn.to/2HNFhKK
Big Tools I use:
Table Saw, SawStop PCS: http://amzn.to/2H3ySLb
SawStop Industrial Mobile base: http://amzn.to/2spo6f6
Overarm dust collector: http://amzn.to/2CdfRlR
SawStop 80 tooth blade: http://amzn.to/2Cenngl
SawStop 40 tooth blade: http://amzn.to/2CdLRXh
SawStop Dado safety cartridge: http://amzn.to/2H8e7ye
DeWalt Dado: http://amzn.to/2CeqLrs
SawStop Cast Iron Extension: http://amzn.to/2Cdtj9s
Bench Dog Router Extension: http://amzn.to/2Bpcbkr
Router: http://amzn.to/2H5YK9v
Router Lift: http://amzn.to/2Ejz3En
Band Saw: http://amzn.to/2Eh9pQG
Smaller Tools I use:
DeWalt Drill/Driver set (very nice!): http://amzn.to/2BpDMC7
Clamps: http://amzn.to/2H6tG9t
Bessey REVO Clamps: http://amzn.to/2CeGEOJ
FastCap Glue Bottle: http://amzn.to/2Cf25z5
Chisel set: http://amzn.to/2EVBUAD
Brad point drill bits: http://www.leevalley.com/us/wood/page.aspx?c=&p=42247&cat=1,180
Forstner Bit Extension: http://amzn.to/2CdxB0r
Bubble Level: http://amzn.to/2Elvr50
Sharpening Stones:
DMT 8″ Course (D8C): http://amzn.to/2hZ8AOO
DMT 8″ Fine (D8F): http://amzn.to/2hY4tCT
DMT 8″ X Fine (D8E): http://amzn.to/2Agtofq
DMT 8″ XX Fine (D8EE): http://amzn.to/2BwMziU
Safety Equipment:
Dewalt safety glasses: http://amzn.to/2Dp5ZpW
Dewalt safety glasses Rx-BiFocal (choose your power): http://amzn.to/2FFV2lw
Dust masks N95: http://amzn.to/2HynRRH
Camera Equipment:
80D: http://amzn.to/2EUq5KV
Lens: http://amzn.to/2CdJKCs
GoPro: http://amzn.to/2BnQa5h
Sandpaper:
3M 100: http://amzn.to/2EiI94g
3M 220: http://amzn.to/2H8us5K