

I’ll be assembling the base of my new Roubo workbench. This is pretty exciting, as it’s been a long road getting this far, with a lot of new skills I needed to learn, such as planing and jointing, and my first mortise and tenon joints. It’s been a bunch of pieces that didn’t look like much, but now I’ll finally be putting it together! I’m a little nervous too, about gluing all the parts, getting them together and getting all the drawbored dowels into the tenons with plenty of glue too.
I’ve got everything ready, my glue bottle is full. I have the 3/8″ white oak dowels all made, 4″ long, with a 3.75″ hole drilled for each of them. That will leave a little bit left to cut off flush with each leg.
I have the vise leg ready for my Benchcrafted leg vise to be installed, I have three dog holes in the right leg. I tried to think about everything that needed to be done, and have it done now, if it was going to make it easier to do now, than later after the base was glued up.
I don’t have much room in my shop, so I am assembling the base on top of the workbench top. I put down my workbench silicone mat, so any glue drips will be able to dry and pop right off, not getting on the actual workbench top.
I’m just using a regular nylon paint brush to help spread the glue, although right after this, I ordered some silicone glue brushes that also work great. The nylon paintbrush did wash up easily afterwards, and it still good to use for painting.
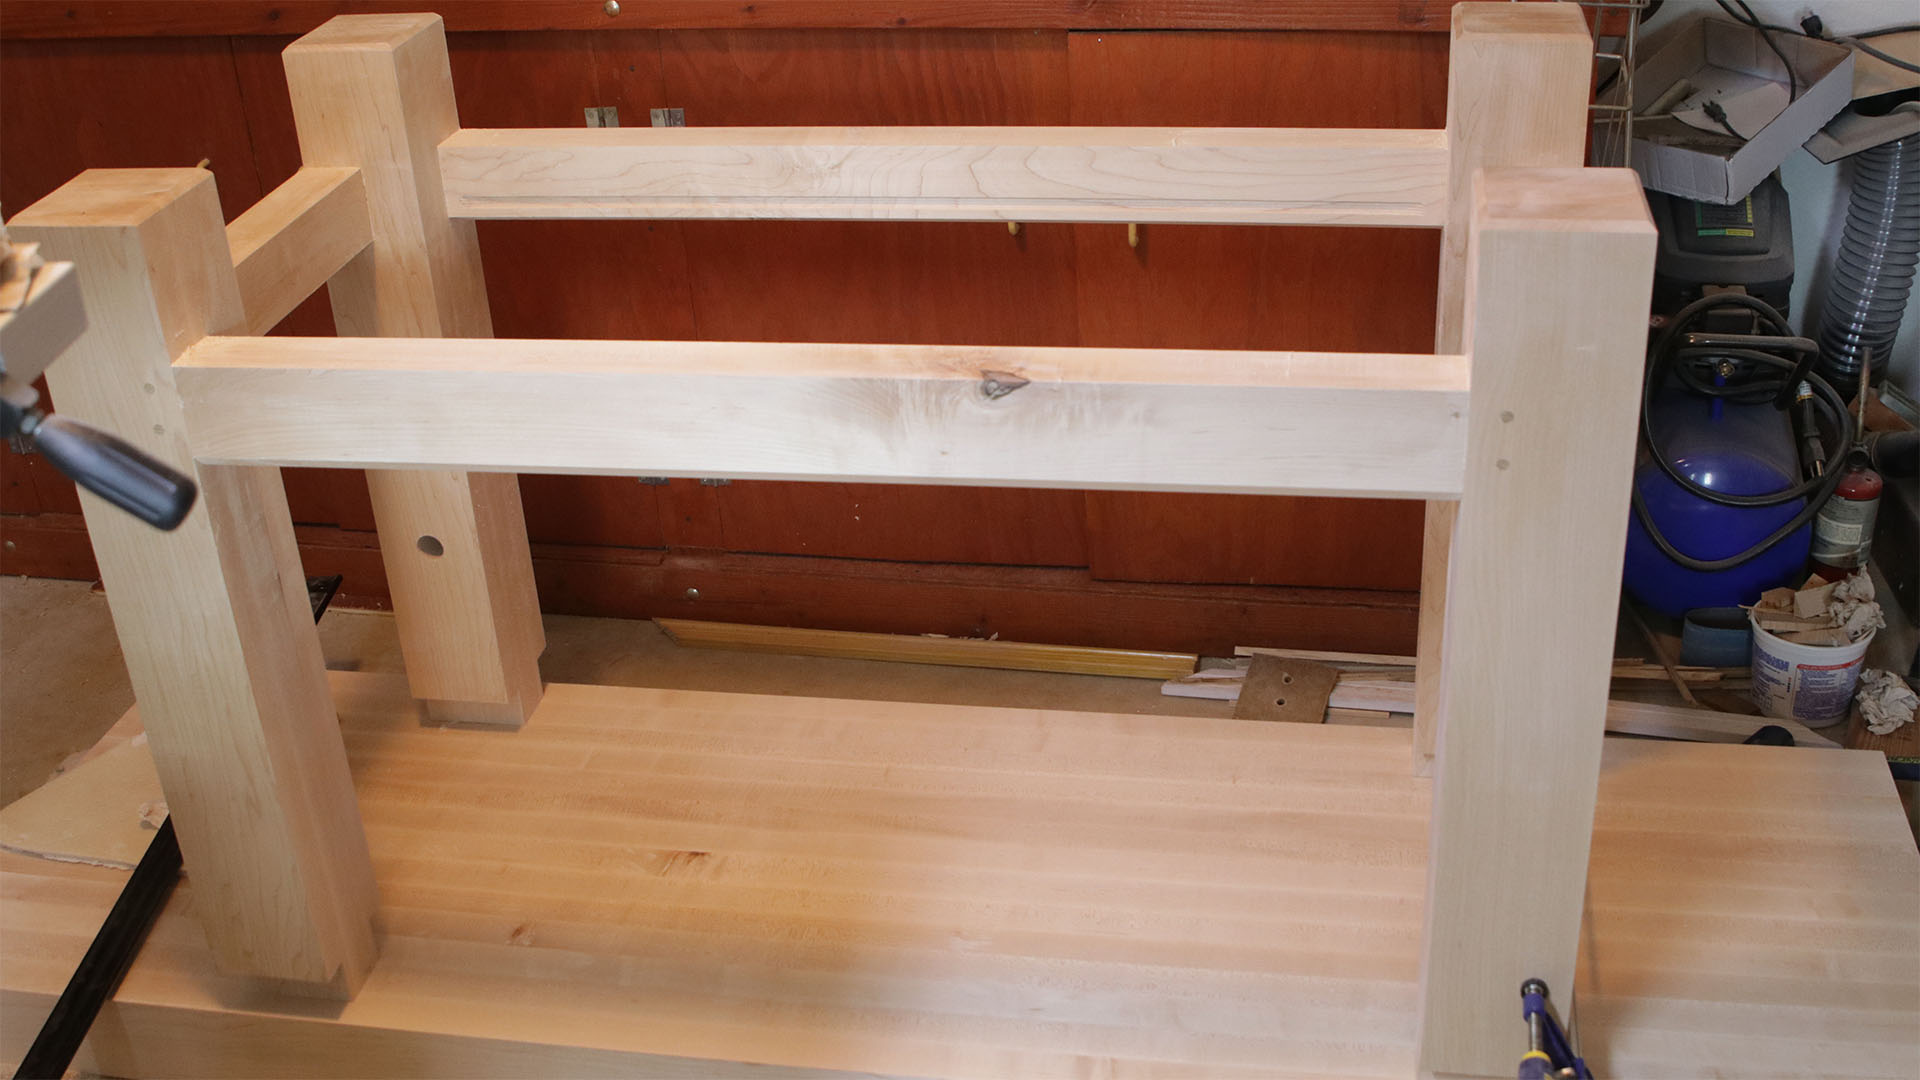
I had already done a test fit of the entire base the day before. Everything fit, and the base was square. The width of the legs matched the width of the top, as those need to come together later and match just flush. One thing to be careful of, with Christopher Schwarz’s design, the tenons on each of the stretchers on each log to just meet inside the leg. You may have noticed this when digging out the mortise. If a tenon was slightly too long, it is possible one tenon could keep the other tenon from going in all the way. Testing one piece at a time wouldn’t find this problem; that’s a good reason to do a full test fit before applying any glue. Each leg and each stretcher was marked as to where it went.
I decided to put glue on the mortise and on the tenon, I wanted a lot of glue on everything, and didn’t want the tenon to get the glue wiped off as it went into the mortise. I used plenty of glue, and started on the shorter stretchers. I used a rubber mallet when needed, to help get the tenons into the mortises. I also wanted to move fast. After getting this together, if I needed to push it a little bit to get it more square, I wanted to be able to do that, before the glue was dry. Although the test fit worked great, the bench was square with no adjustments needed.
So I spread the glue, put the short tenon in. Spread glue on the other side of the short stretcher and into the opposite leg mortise, and put hose together. It was going well so far. I did the other two legs and the other short stretcher. Then moved onto the the longer stretchers and got both of those into a pair of the legs. Then I was ready to put glue onto the final two long stretcher tenons and mortises. These would have to be done at the same time, and the other two legs pounded onto the rest of the bench. I glued those up and slid them into the leg mortises. But hitting with the rubber mallet wasn’t push that in. I ended up raising the bench up so gravity would help me push the leg and mortises over the tenons. That worked, and everything went in.
Oh, and if the short stretcher doesn’t go in all the way, of course you can use a long clamp to help squeeze those together.
When pounding the dowels in, I used a 3 lb hammer. That’s what I read to use somewhere, and it easily does the job. One thing to watch, hitting the dowels slightly off, and they will break. Or they will shatter for no reason I could see. The book didn’t mention these problems. I didn’t know what to do, and decided they’d gone in most of the way, and not to worry about it. Most of the dowels easily went in.
I wiped off excess glue, but after the glue dried, I went in and cut the excess dowels off, and sanded that with 220 then 400 grit sandpaper. I used a chisel to get into the corners of the leg and stretchers, and cut off excess glue that I wasn’t able to wipe out. I made a couple of flat sanding boards, and glued sandpaper to those. One edge was tapered so that I could get right into the corner of a joint and sand the excess glue off. I spent quite a bit of time making sure all excess glue was gone, and everything was ready for the next step. I’m really trying to pay attention to detail, and want the bench to look great, so this was a worthwhile step for me to take.
The last step I did here was to go ahead and mark and cut out the 4 mortises in the benchtop. These are two inches deep, and in the book, it syas to use the base itself to mark where these go. I marked the sides with blue masking tape. As far as where to start and stop the tenon away from the benchtop edge, I used my digital calipers to measure carefully where each tenon started and how thick it was. I wanted the mortise to match exactly, so that the edge of the leg would meet the edge of the benchtop exactly. This method worked out great, as you’ll see in the next video/article installment!
I used the same method to dig out these mortises as before, the router with the spiral upcut bit, using a router bushing to follow my hardboard template. Then I used a chisel to cut the rest of the wood, and square the cut.
Please check out the video to see how it went. I’m pleased to see it coming together finally. Next time I’ll be putting the bench base onto the top.
Equipment Used:
Glue: http://amzn.to/2EF0qcl
Glue bottle: http://amzn.to/2FgASiL
Silicone workbench mat: http://amzn.to/2CwWiFl
Silicone glue brush: http://amzn.to/2FhAu3m
Christopher Schwarz book: http://amzn.to/2FdVmbO
3 lb hammer: http://amzn.to/2HukZWx
3/4″ brad point bit: http://amzn.to/2H8gJMb
12″ Drill bit set: http://amzn.to/2EK39y1
Router Bit: http://amzn.to/2E3ja0L
Big Tools I use:
Table Saw, SawStop PCS: http://amzn.to/2H3ySLb
SawStop Industrial Mobile base: http://amzn.to/2spo6f6
Overarm dust collector: http://amzn.to/2CdfRlR
SawStop 80 tooth blade: http://amzn.to/2Cenngl
SawStop 40 tooth blade: http://amzn.to/2CdLRXh
SawStop Dado safety cartridge: http://amzn.to/2H8e7ye
DeWalt Dado: http://amzn.to/2CeqLrs
SawStop Cast Iron Extension: http://amzn.to/2Cdtj9s
Bench Dog Router Extension: http://amzn.to/2Bpcbkr
Router: http://amzn.to/2H5YK9v
Router Lift: http://amzn.to/2Ejz3En
Band Saw: http://amzn.to/2Eh9pQG
Smaller Tools I use:
DeWalt Drill/Driver set (very nice!): http://amzn.to/2BpDMC7
Clamps: http://amzn.to/2H6tG9t
Bessey REVO Clamps: http://amzn.to/2CeGEOJ
FastCap Glue Bottle: http://amzn.to/2Cf25z5
Chisel set: http://amzn.to/2EVBUAD
Brad point drill bits: http://www.leevalley.com/us/wood/page.aspx?c=&p=42247&cat=1,180
Forstner Bit Extension: http://amzn.to/2CdxB0r
Bubble Level: http://amzn.to/2Elvr50
Sharpening Stones:
DMT 8″ Course (D8C): http://amzn.to/2hZ8AOO
DMT 8″ Fine (D8F): http://amzn.to/2hY4tCT
DMT 8″ X Fine (D8E): http://amzn.to/2Agtofq
DMT 8″ XX Fine (D8EE): http://amzn.to/2BwMziU
Camera Equipment:
80D: http://amzn.to/2EUq5KV
Lens: http://amzn.to/2CdJKCs
GoPro: http://amzn.to/2BnQa5h
Sandpaper:
3M 100: http://amzn.to/2EiI94g
3M 220: http://amzn.to/2H8us5K