I’ll go over my Roubo workbench drawer cabinet design and construction. In my Christopher Schwarz book, he says not to clog up the underneath of your workbench with storage, as it can block methods of clamping work to the top of the bench. I decided with my small shop, if I could sneak in a couple small drawers under the workbench, it would be worth it for the storage. I tried to keep it a fairly low profile, to leave plenty of room under the workbench. When I put out a picture of my drawer cabinet, I got this reply:
https://twitter.com/RudeMechanic/status/978741124792807424
Haha! Dang it – I hope I’m not in trouble…

Design
Since this Roubo workbench drawer cabinet isn’t in my book of plans for the bench, I wasn’t quite sure how to build it. I decided to stay with the maple construction. I wanted the top to be made out of tongue and groove maple boards, like the shelf Christopher makes in his book. The bottom is a piece of plywood, resting loose in a dado cut in the four sides.
The Cabinet
The drawer cabinet rests between the front and back stretcher. When I made those, I put a dado in the backs of those pieces, and glued in a piece of maple, maybe 3/4 x 3/4″ by the length of the stretchers between the legs. The cabinet rests on these pieces. The length of the cabinet is about 1/8″ shy of the distance between the legs, the depth is about 1/16″ less than the distance between the stretchers.
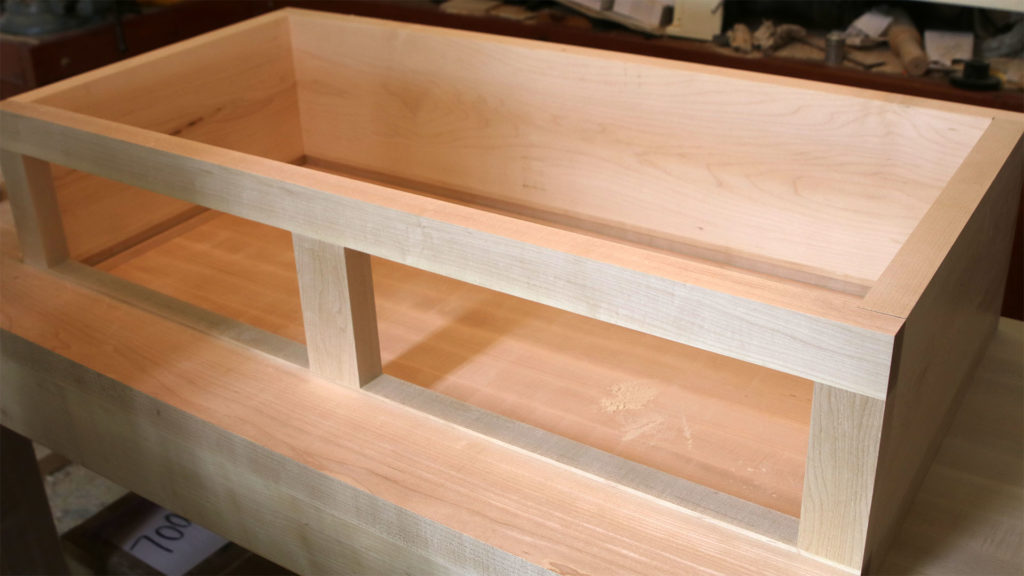
I used 6/4 maple for the sides and top boards. The side pieces were a little short, I ended up gluing a couple extra inches to the side pieces to get the height I wanted in the cabinet. The front of the drawer cabinet uses 5 pieces, two long horizontal pieces on the top and bottom, then three spacers between those, one on each side, and one in the middle to separate the drawers.

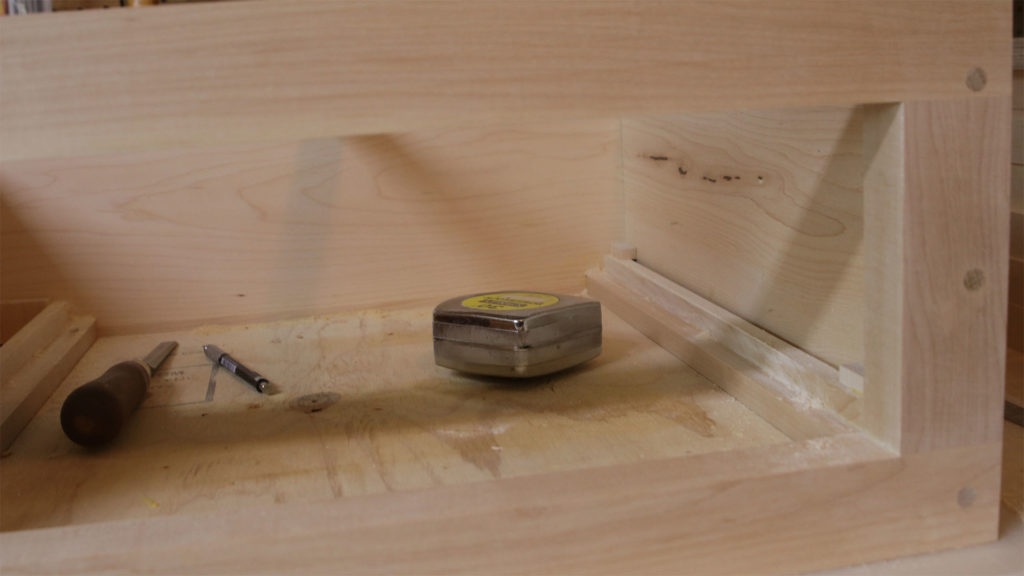
Rabbets were cut in the front and back pieces, that the side pieces sit in. I put the dado along the bottom edges for the plywood bottom of the cabinet. I don’t know if it needed a bottom, but I guess it will keep the spiders and maybe some dust from getting into the drawers. The bottom floats freely in the cabinet. Of course, when making dadoes for the bottom, the way it was built, I could cut them all the way across the side pieces, but I had to start and end the dado on the front and back pieces without going all the way through. I put pieces of tape on the table saw where I wanted the piece to start and stop, and dropped the piece along the fence down on the dado blade and moved it until it got to the tape for the back end. Then I stopped the saw and lifted it off. I finished those dado ends with a chisel. This technique keeps the dadoes from being visible on the outside of the cabinet. In my case, it would have been visible from the sides.
I cut rabbets along the top edge, 3/4″ in, leaving 3/4″ around the top edge. The top shelf pieces will fit inside this rabbet. I made it deep enough so the top would sit a few hundredths of an inch lower than the rim of the sides. That way, hopefully it will keep things from rolling off the top shelf. Also, same idea here, one two of the pieces, I had to stop short of cutting the rabbets all the way tot he ends, or they’d be visible from the outside of the box – which I definitely don’t want. I finished the cuts with the chisel again.
I glued that all together, making a box, and putting the bottom plywood in when I made that. Don’t forget to put the bottom in as you glue the sides up! Since there were no plans, I was winging it here, not really knowing what to do. I didn’t want screws, the bench wasn’t made of bolts and screws. Dowels to add strength on each corner of the cabinet. I put three in each corner. I know end grain gluing isn’t the strongest on that front piece, where the three short vertical spacers are glued on. By gluing some plywood pieces on the inside across the seams, it strengthened that joint.
I then added in maple runners for the drawers. I added pieces on each side to keep the drawer height correct, and to keep the drawer from going side to side. Gluing a thin piece to the top keeps the drawer from tipping down as I open it.

The Drawers
I then made my first two drawers ever. I used 1/2″ baltic birch plywood for the sides and bottom. Once again, I did a floating bottom sitting in dadoes. I also ran the top edges of the drawers through my router with a small roundover bit, to ease the sharp edges.
I decided to also screw the drawer sides together, using the Kreg pocket hole jig. This worked great. The pocket screws are showing on the back of the drawer where no one will see them, and also on the front of the drawer, which gets covered by the maple drawer fronts I’ll be making.
I also waxed the drawer runners inside the cabinet and the bottom side edges of each drawer so they would ride smoothly in and out.
The Shelf
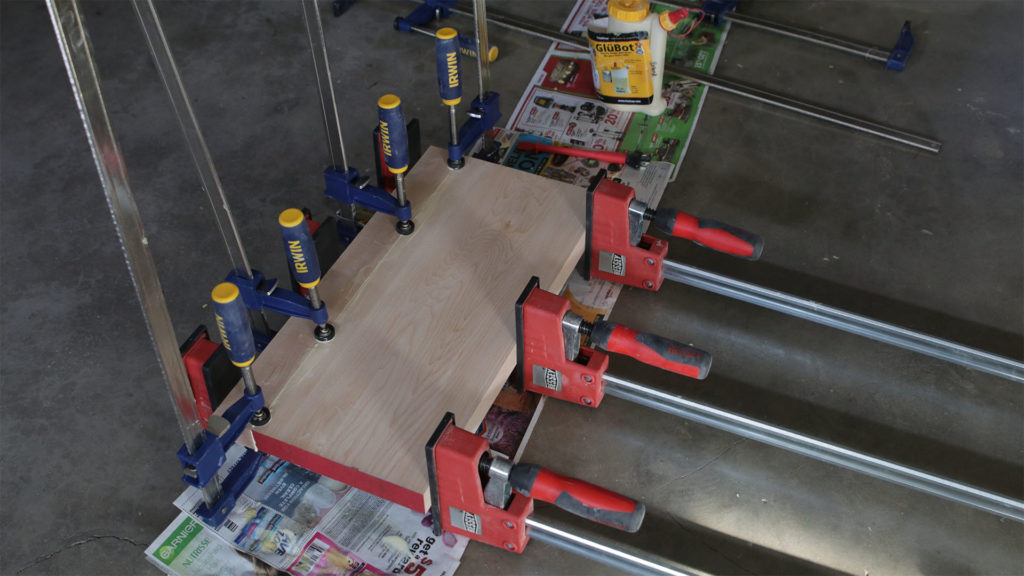
The top boards are all tongue and groove, as is usual with most everything on the workbench, it was my first time making tongue and groove boards! I did this on the table saw. I had the boards on edge, and cut the grooves first. Set the fence where it will make the desired width, then make a pass through, and flip the board 180 degrees and make a second pass. This ensures the groove will be dead center in the piece. I ran all the boards through, not yet worrying about finishing the extra material in the center (I don’t want to move the fence until all the grooves have their outside cuts made.
Of course, don’t cut a tongue or groove in the outside edges of the outside boards; I just left those flat. After all pieces were cut, I moved the fence and then cut out the rest of the material. I cut these the width mentioned in Christopher Schwarz’s book, I think the tongue is 1/2 thick.

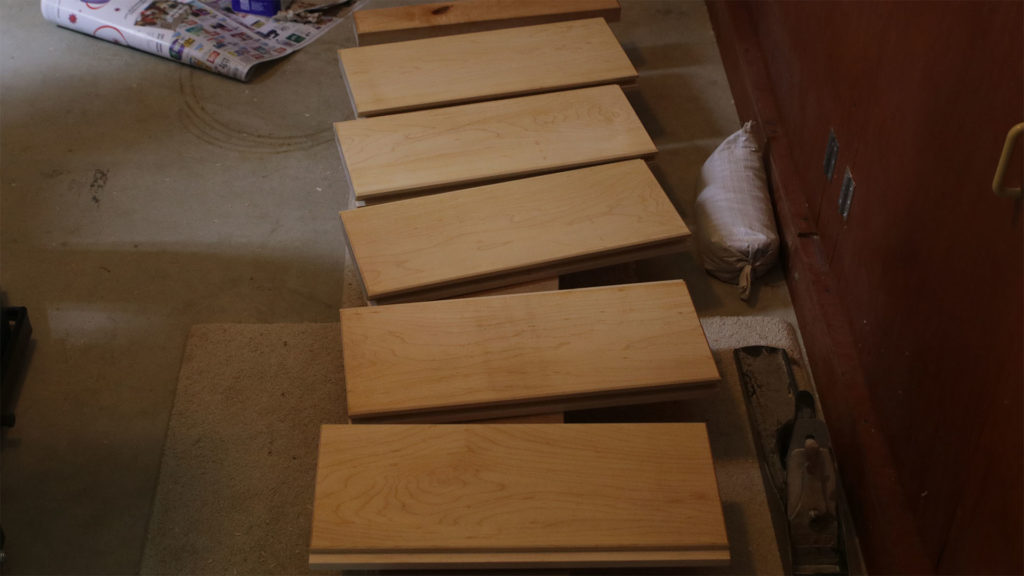
Now the trick is to cut the tongues. I started by cutting the edges, with the board up on it’s edge again. I crept up on the correct width, cutting too little at first, measuring and trying again. It’s a little difficult to check the width, as the material is still on the board and won’t yet fit in the groove. At the end of the process, I set the board flat, and made a cut on each side to remove the material with a second cut. But I didn’t want to move the fence again until all the boards were cut. After making sure the width was right, I finished all the cuts on each edge, first one, then again flipping the board 180 degrees and making a second cut, so the tongue is perfectly centered. After those were done, I set the blade height and ran the boards flat to remove the rest of the material. For my first tongue and groove boards – I think they came out great.
I used a block plane to champfer all four edges of the boards. This really gave it a nice look. From what I know of the way wood expands and contracts, the top shelf part would be the most likely to have the most movement. So this can’t be all glued in super strong, or it will probably crack. I put a dowel in the center of each board on the front and back. Each board has some wiggle room in it so it can expand or contract, and move in and out of the grooves. The only trouble I had here is, when hitting the dowel in, it raised the board too much as it was bouncing around and the dowel went in too far. It was a mess, and I ended up drilling that one out and starting over. This time, I clamped each board in as it drilled and put the dowels in, and the rest of attaching the top went very easily.
Drawer Fronts
I cut the maple front pieces out and ran the edges through my router with a roundover bit. First I changed out the bearing with a smaller bearing, then I ran a test piece through, and made sure I raised the bit up enough to get a relief (I think they call it) about the same size on each side of the round over. So I get an edge, the round over, then another edge, of the same size. The routed profile looked like a good drawer profile, and used a bit I already had. I looked it up and it said this is called a beaded edge.
I used double sided tape to stick on the drawer fronts and hold them, then I put two screws in from the back side. Once again, only two screws, in the middle of the drawer fronts. If needed, the front pieces can expand and contract. They wouldn’t be able to do this if I put 4 screws, one in each corner.
Besides the boiled lindseed oil on the outside of the drawer cabinet, I put a few coats of poly on the inside of the drawers. I think that will make them easier to clean.
Conclusion
For not knowing what I was doing, I think the Roubo workbench drawer cabinet came out great. I used walnut for the fronts, just as an accent to all the maple. I’ll be using walnut on the front of the leg vise chop also.
This is part 10 of my YouTube video series, I think I just may have one or two shorter videos left, there’s not a lot left to do on the workbench at this time. It’s finally about done!
Parts Used
Used in this build:
Dado Blade: http://amzn.to/2CeqLrs
Christopher Schwarz book: http://amzn.to/2FdVmbO
Glue: http://amzn.to/2EF0qcl
Chisels: http://amzn.to/2EVBUAD
Clamps: http://amzn.to/2H6tG9t
Round over bits: https://amzn.to/2r0Vjtv
Block Plane : https://amzn.to/2r1eCTe
Double sided tape: https://amzn.to/2KebfkJ
Kreg pocket jig system: https://amzn.to/2HwAiC4
Boiled lindseed oil: https://amzn.to/2KgAFyn
Big Tools I use:
Table Saw, SawStop PCS: http://amzn.to/2H3ySLb
SawStop Industrial Mobile base: http://amzn.to/2spo6f6
Overarm dust collector: http://amzn.to/2CdfRlR
SawStop 80 tooth blade: http://amzn.to/2Cenngl
SawStop 40 tooth blade: http://amzn.to/2CdLRXh
SawStop Dado safety cartridge: http://amzn.to/2H8e7ye
DeWalt Dado: http://amzn.to/2CeqLrs
SawStop Cast Iron Extension: http://amzn.to/2Cdtj9s
Bench Dog Router Extension: http://amzn.to/2Bpcbkr
Router: http://amzn.to/2H5YK9v
Router Lift: http://amzn.to/2Ejz3En
Band Saw: http://amzn.to/2Eh9pQG
Smaller Tools I use:
DeWalt Drill/Driver set (very nice!): http://amzn.to/2BpDMC7
Clamps: http://amzn.to/2H6tG9t
Bessey REVO Clamps: http://amzn.to/2CeGEOJ
FastCap Glue Bottle: http://amzn.to/2Cf25z5
Chisel set: http://amzn.to/2EVBUAD
Brad point drill bits: http://www.leevalley.com/us/wood/page.aspx?c=&p=42247&cat=1,180
Forstner Bit Extension: http://amzn.to/2CdxB0r
Bubble Level: http://amzn.to/2Elvr50
Sharpening Stones:
DMT 8″ Course (D8C): http://amzn.to/2hZ8AOO
DMT 8″ Fine (D8F): http://amzn.to/2hY4tCT
DMT 8″ X Fine (D8E): http://amzn.to/2Agtofq
DMT 8″ XX Fine (D8EE): http://amzn.to/2BwMziU
Safety Equipment:
Dewalt safety glasses: http://amzn.to/2Dp5ZpW
Dewalt safety glasses Rx-BiFocal (choose your power): http://amzn.to/2FFV2lw
Dust masks N95: http://amzn.to/2HynRRH
Hearing protection: http://amzn.to/2FPrV3v
Camera Equipment:
80D: http://amzn.to/2EUq5KV
Lens: http://amzn.to/2CdJKCs
GoPro: http://amzn.to/2BnQa5h
Sandpaper:
3M 100: http://amzn.to/2EiI94g
3M 220: http://amzn.to/2H8us5K


Steve, I just ran across your workbench YouTube videos while trying to work out the detail on my bench plans which is basically the same thing you build w/o the cabinet or tail-vice. It looks like your ran into the same issue of the front stretcher tenons and the BenchCrafted Glide M mortise for the Crisscross. I do not see that you published a video of the installation completed. What was the outcome of the vice installation and would you have any suggestions to offer?
Thanks
Hey Doug, I’ve been on some other projects, and haven’t gotten to the final couple videos yet for the leg vise. I think I already showed that issue with the tenon getting cut out a bit as I cut the huge mortise for the criss cross part of the vise. That worked out fine. Really the final part I want to do, and am hoping to get to this week or next is to carve the year into the leg vise chop, like Christopher did on his bench in his book. I thought that looked cool, and am trying my best to see if I can carve the numbers somewhat good looking! As soon as I get those numbers carved, I’ll be putting it together and making the video for that. The leg chop came out nice. As part of the throw a different kind of wood in here and there, I had a big piece of maple for the leg chop (8/4 or 2″ thick), but the criss cross mortise in the back of the chop is so deep it almost goes all the way thru, so I glued a piece of walnut on top of the maple, and then shaped it. It came out looking pretty nice I think.
In the past few months, after I did that Arduino dust collection monitor, to help me determine when to clean the cartridge filter, I started making a Arduino bedside clock with a 7″ touch screen. It has weather info, forecast, etc on it, and will also be doing some of my home automation stuff. The whole clock will go in a nice wooden case I’ll make out of it (in a future video) and for me, will be the ultimate bedtime clock, able to play MP3 music, an auto dimming display, etc – pretty fun stuff.
Anyway – I better hurry and carve that year into the leg chop – before the years changes to 2019! If you have any further questions, or any additional pictures would help, let me know. I’m glad to help.