

I want to go over my dust collection system, and explain some of the tips and tricks that I know of. Dust collection is for a couple reasons. One: to get a lot of the sawdust and chips collected without making a mess over the shop. Two: to try to reduce the amount of dust in the air for you to breath. Wood dust in the air is really bad for your lungs, especially the smaller particles. Also, you can get wood dust allergies, which would be bad if it made it so you couldn’t enjoy your hobby, or how you make your living.
I got a used Jet DC 650 dust collector. Actually, it had never even been used. I’d read that the bags don’t really collect the fine particles very well, and the cartridge filters work best. I ended up getting a 35A274NANO filter from https://wynnenv.com/products-page/woodworking-filter-pricing/, these guys were great, and provide a kit to add the cartridge filter on top of the Jet collector, all I had to do was make a plywood ring adapter so it would fit on top. It’s worked great ever since.

I then made a Thien separator out of an old plastic trash can. Actually it was practically new can I bought for the trash, right before the trash company went to the very large barrels that they provide.
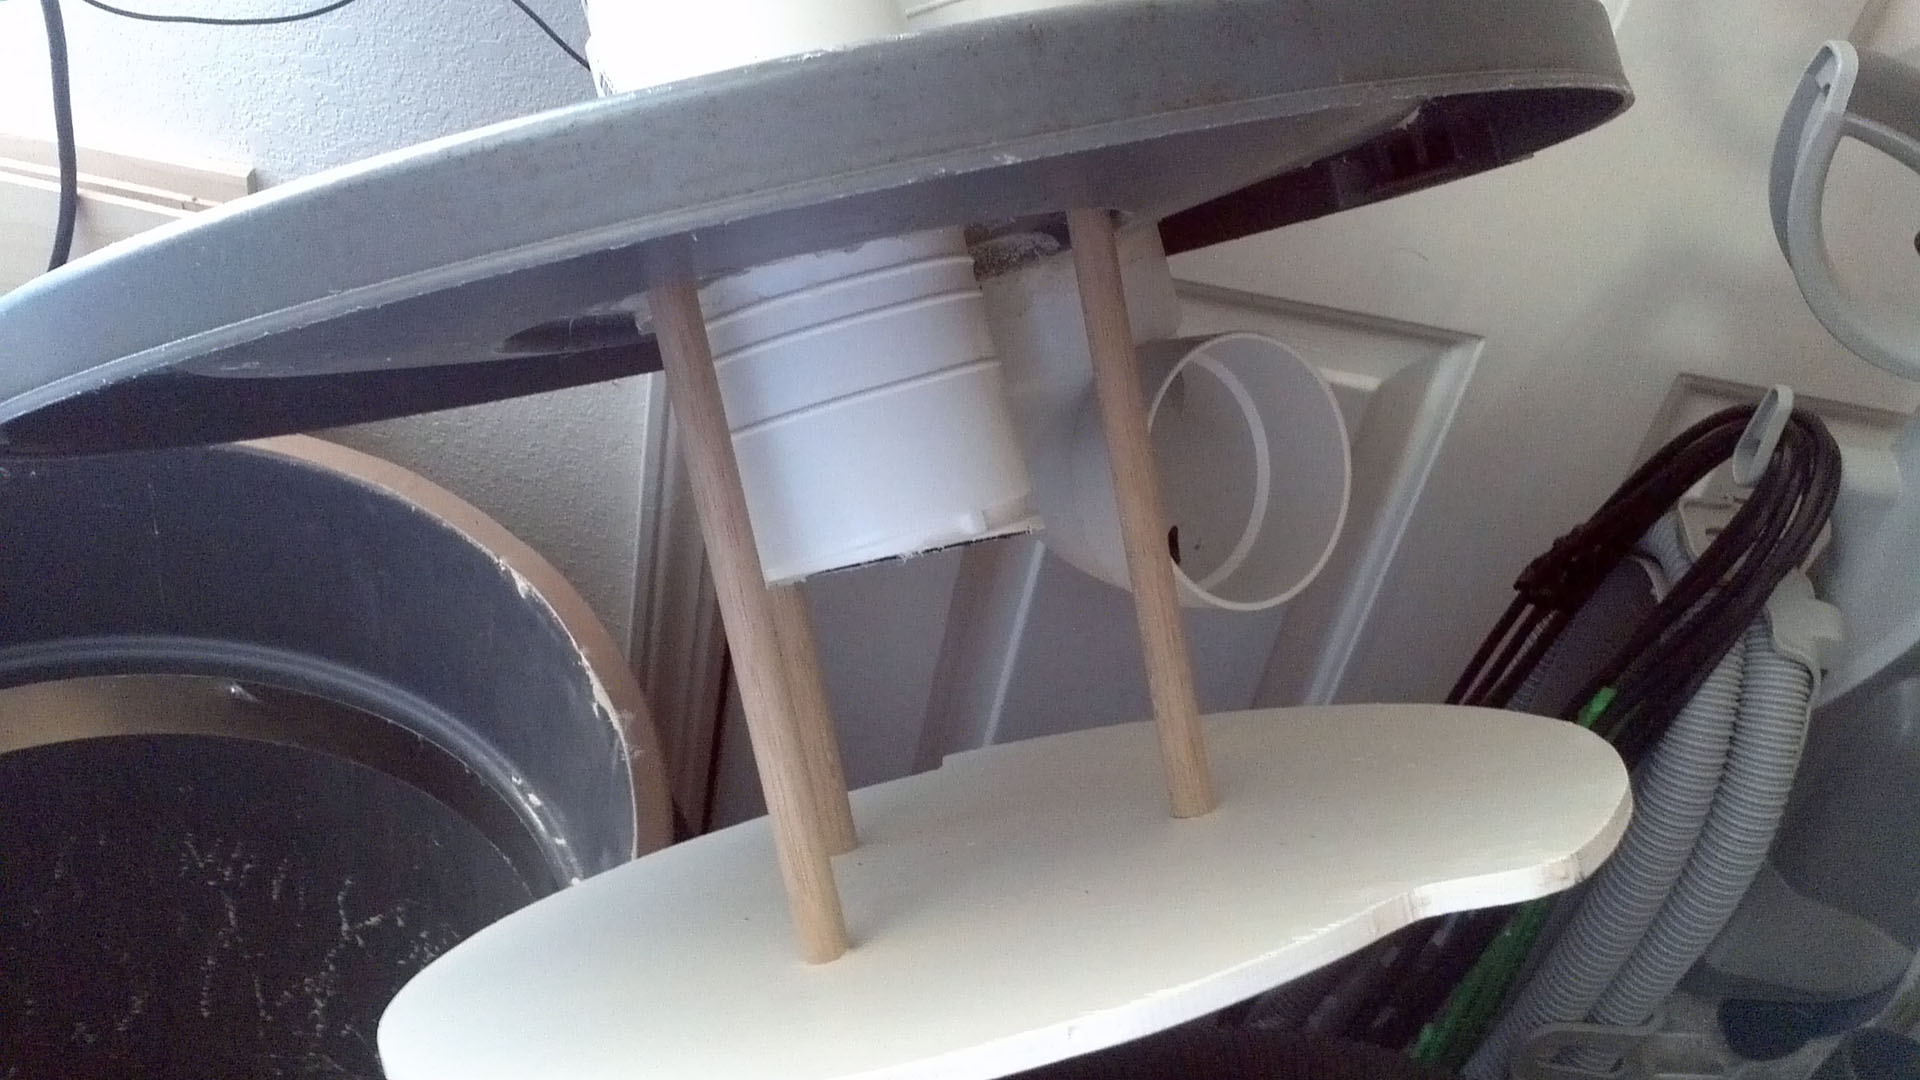
The Thien separator takes pretty much all the dust and chips and puts it into the trash can, before it gets to my Jet dust collector. It works by swirling the material around in a circle, and it can then fall down below the plywood piece, and the central exit in the center pretty much only gets clean air, although a lot of very fine particles still exit this system.
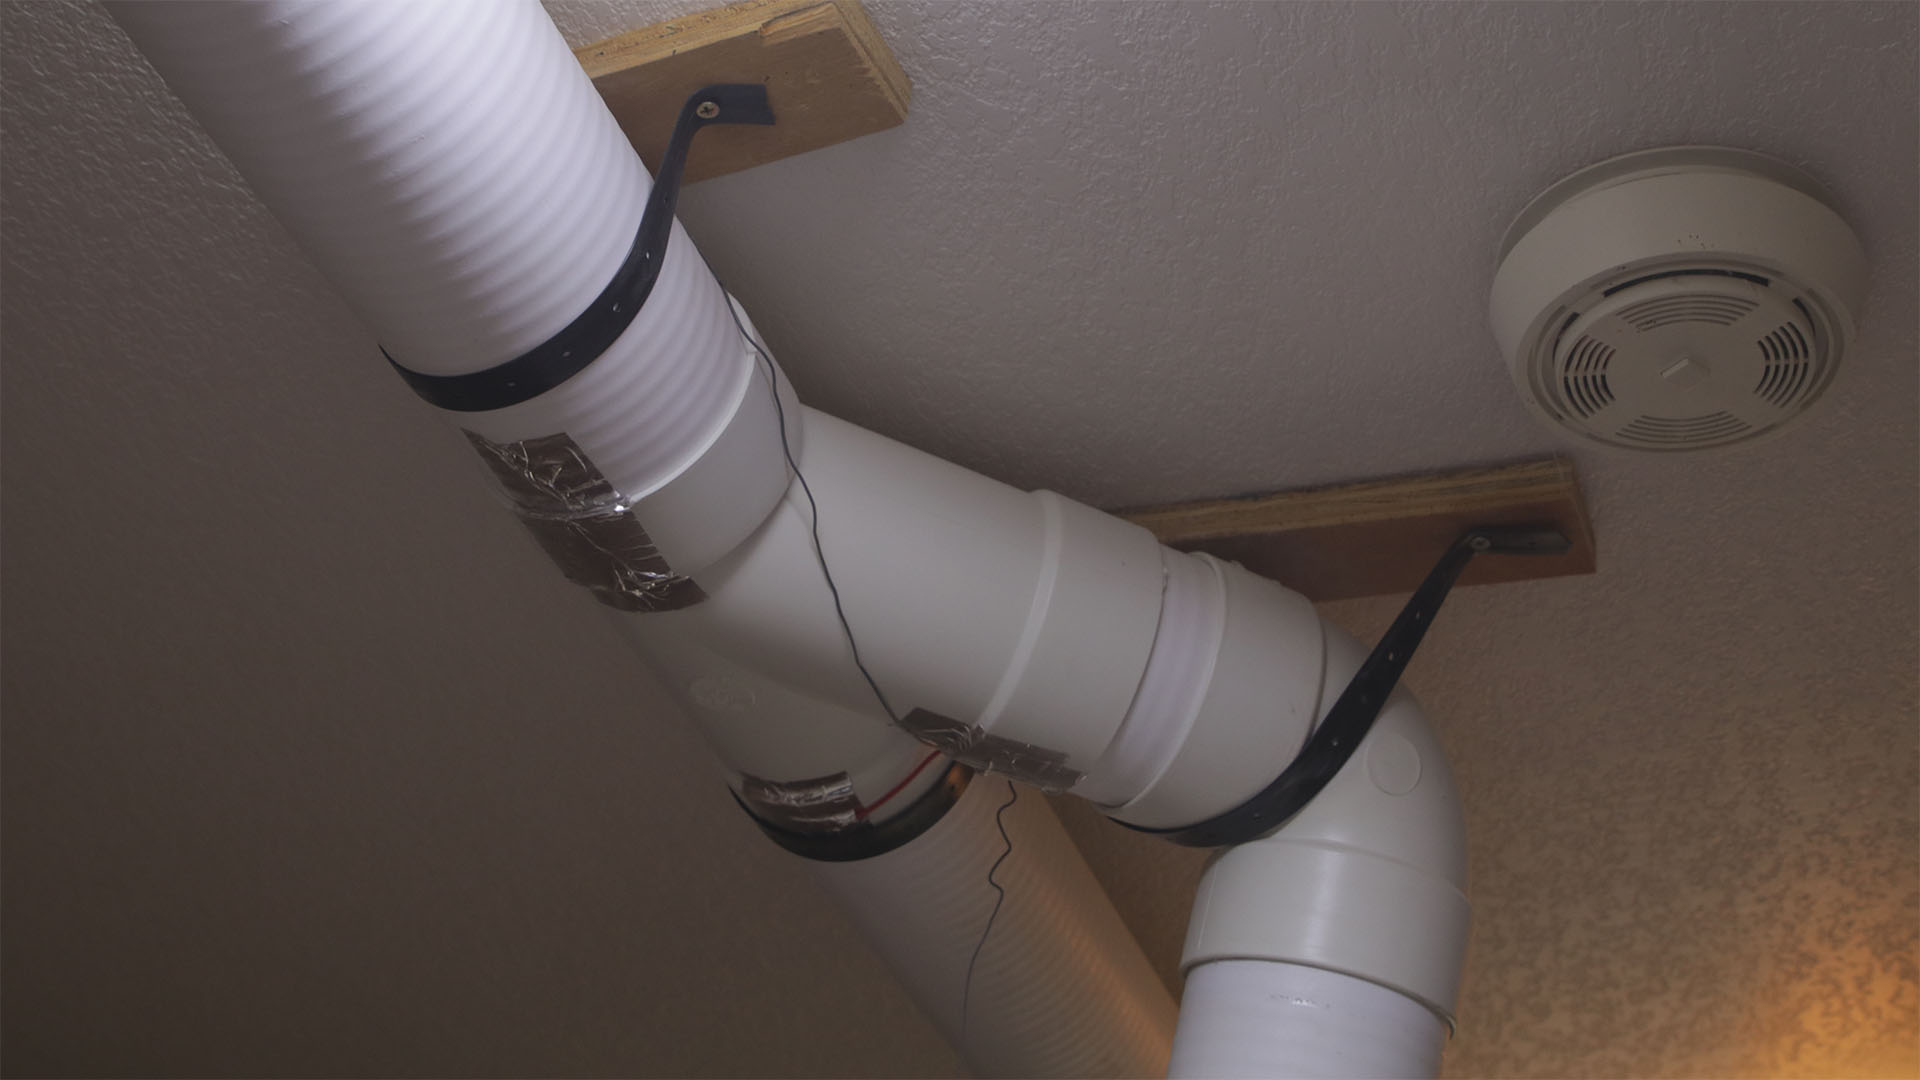
I use a combination of 4″ sewer pipe and fittings (from your local big box store), as well as some 4″ flexible tubing. The thinner sewer pipe is lightweight and cheap. It’s straight walls offer little resistance and keep the vacuum higher. The vacuum in a dust collection system is low, the lightweight sewer/drain pipe is definitely strong enough for this use. The flex hose has a much higher resistance, use shorter runs of this, and try to keep from using sharp turns. Sharp turns, and hard 90 degree fittings will really cause you to loose vacuum in a dust collection system. Use the sweep 90 degree fittings, that have longer sweeping turn. Or use two 45 degree fittings, and try to space those a bit apart with a section of straight pipe.
Don’t use any T fittings, but use a Y fitting. Remember, the flow when hitting a T fitting is going to cause everything to come to an abrupt stop before continuing on down to the dust collector. You can think of it like a race track. At a 90 degree intersection is going to be slow, merging onto the freeway on a “Y” onramp, you can keep your speed up. It’s important to keep the speed up for better dust collection.

I have about 8 gates in my system. I keep only one 4″ gate open at a time, at the tool I’m working at, to keep the suction at it’s greatest. I didn’t realize at first, but these gates have a direction to be installed. The knob on the gate pushes the gate down. The knob should be towards the tool. If you install the gate backwards, like I did on about half of them, tightening the knob pushes the gate away from the suction side, and causes a small leak. If you have a bunch of these backwards, the small leaks add up.

Keep in mind when installing your system, that the shop changes over the years. The dust collection parts add up in cost. You don’t want to buy new fittings every time you need to move the dust collection pipe around. What you should do instead of pvc glue, is use short screws to connect the fittings to the sewer/drain pipe. Pre drill 3 or 4 holes around the fitting and put a screw into the sewer pipe, try not to poke through the inside wall of the pipe, so the shavings won’t have something to get clogged on. When you need to move things around maybe years in the future, you can remove the screws and re use the same parts. I haven’t started using the screw system yet, but I will be doing that.
I used some of the plastic strapping screwed into the studs to attach the pipe to the walls and the ceiling. I ran the pipe right down the middle of the ceiling. At the time I wasn’t sure if I should go around the walls. I didn’t and am now glad, as I recently installed lumber racks on the walls up near the ceiling, and used this space wisely, getting my lumber off the floor.

In addition to the dust collection system, I have a Jet Air Filtration system hanging from my ceiling. This collect dust that gets into the air from various tools, as well as sanding. This is great to clear the air out. Even when this is on, it can get so dusty in the shop so quick, I still wear my N95 dust mask when the dust is going to be bad.

I’m currently working on an Arduino electronic Dust Collection Monitor system, with a little 3.5″ touch screen. I’ll be having a video of this soon, and will make the code available for a small fee. This is looking very cool so far. It will have two pressure sensors, one on the inside of the dust cartridge, and one on the vacuum side. The idea is to monitor for a build up of pressure inside the cartridge filter. A clean filter will have almost no pressure build up, as it gets clogged, the pressure will build, vacuum will fail, and dust will start clogging your equipment. This monitor will notify you in advance of that. You may want to Subscribe to my YouTube channel to keep an eye out for that video. You will need to know how to solder, but you won’t need to know how to program, I’ll have the programming done for you. I’ve added a clock on it, as well as a tiny temperature and humidity module to display those when the system dust collector is off.
After that project is complete, I’ll be adding onto that same Arduino board a system that will automatically open and close the correct gates based on what tool you are using. It will still monitor the filter cartridge pressure, but will also turn on the dust collector when you turn on a tool, and arrange the gates as needed for that specific tool. Sounds like fun!
Here’s a very technical article about dust collection, but very technical: http://billpentz.com/woodworking/cyclone/ducting.cfm This article even talks about the static electricity issue, and basically says for small home shops, it is a non issue. I went ahead and added some static protection in case any way, here’s a video of that.
Parts used in this article:
Jet Dust collector https://amzn.to/2JVO0Lm
Jet Air filtration https://amzn.to/2rmJ1f3
4″ flex hose https://amzn.to/2rsBT1J
4″ blast gate https://amzn.to/2roLhlS
Big Tools I use:
Table Saw, SawStop PCS: http://amzn.to/2H3ySLb
SawStop Industrial Mobile base: http://amzn.to/2spo6f6
Overarm dust collector: http://amzn.to/2CdfRlR
SawStop 80 tooth blade: http://amzn.to/2Cenngl
SawStop 40 tooth blade: http://amzn.to/2CdLRXh
SawStop Dado safety cartridge: http://amzn.to/2H8e7ye
DeWalt Dado: http://amzn.to/2CeqLrs
SawStop Cast Iron Extension: http://amzn.to/2Cdtj9s
Bench Dog Router Extension: http://amzn.to/2Bpcbkr
Router: http://amzn.to/2H5YK9v
Router Lift: http://amzn.to/2Ejz3En
Band Saw: http://amzn.to/2Eh9pQG
Smaller Tools I use:
DeWalt Drill/Driver set (very nice!): http://amzn.to/2BpDMC7
Clamps: http://amzn.to/2H6tG9t
Bessey REVO Clamps: http://amzn.to/2CeGEOJ
FastCap Glue Bottle: http://amzn.to/2Cf25z5
Chisel set: http://amzn.to/2EVBUAD
Brad point drill bits: http://www.leevalley.com/us/wood/page.aspx?c=&p=42247&cat=1,180
Forstner Bit Extension: http://amzn.to/2CdxB0r
Bubble Level: http://amzn.to/2Elvr50
Sharpening Stones:
DMT 8″ Course (D8C): http://amzn.to/2hZ8AOO
DMT 8″ Fine (D8F): http://amzn.to/2hY4tCT
DMT 8″ X Fine (D8E): http://amzn.to/2Agtofq
DMT 8″ XX Fine (D8EE): http://amzn.to/2BwMziU
Safety Equipment:
Dewalt safety glasses: http://amzn.to/2Dp5ZpW
Dewalt safety glasses Rx-BiFocal (choose your power): http://amzn.to/2FFV2lw
Dust masks N95: http://amzn.to/2HynRRH
Hearing protection: http://amzn.to/2FPrV3v
Camera Equipment:
80D: http://amzn.to/2EUq5KV
Lens: http://amzn.to/2CdJKCs
GoPro: http://amzn.to/2BnQa5h
Sandpaper:
3M 100: http://amzn.to/2EiI94g
3M 220: http://amzn.to/2H8us5K