

I looked all around online at the different cross cut sleds that people were making. I really liked the Nick Ferry video, his sled really looked awesome, and he explained how to make it really well. I went ahead and purchased his plans as well. You can also check out his plans here: https://nickferry.com/product/table-saw-cross-cut-miter-sled/
Here’s a link to Nick’s how to make video: https://www.youtube.com/watch?v=ZtwK9X8o1Gw
I won’t be giving out measurements for the sled. That is part of Nick’s plans and since I pretty much made Nick Ferry’s sled from his plans, you’ll need to purchase those from Nick. I didn’t make my own design, since I’m fairly new to all this, I just used the best plans I found online. The idea of making my own video and article was just to show a couple things that might help you when you build yours. I would expect you to watch Nick’s video if you’re going to build this.
This sled is on the large side. One plus, it will cut panels up to 24″. The optional miter sled piece is a bit large, thus this sled needs to be fairly big to fit that. I may end up making a smaller sled in the future, with less of the bells and whistles. This is my first ever crosscut sled, so I just followed Nick’s plans, figuring he knew more than I did about what was needed or wanted on a sled. I liked that it was a crosscut sled and a miter sled in one.
I have a SawStop table saw, so I need to make sure my blade doesn’t come near the aluminum tracks, nor any screws used in the build. If you have one of these, remember to make sure and avoid that. I did end up making the front fence a tiny bit taller, to give the blade more room to go under the Kreg top track piece. The height used is based on the Kreg swing stop piece. Because I went slightly taller on the front fence, my swing stop doesn’t quite make it to touch the base of the sled. Thus tiny thin pieces of wood wouldn’t be stopped by the Kreg swing stop. I think that is OK, I just wanted my blade a bit further away from the top track, and I wasn’t sure in two years if I’d remember that, and run it through the front fence at maximum height.
Cut the main base, and the fence parts. The front and back fence are double thick 3/4″ baltic birch plywood (that’s what I used). Remember, the saw cuts most of this sled in half, so the extra thick pieces of fence help hold the two halves together. If you decide not to use the top track and Kreg swing block pieces, you should make the front fence taller to help hold the sled in one piece. When gluing these together, you can clamp all four pieces together. Just remember, only glue the front fence pieces together, and the back two pieces together, don’t glue the front to the back! Old plastic credit cards or gift cards make excellent glue spreaders.

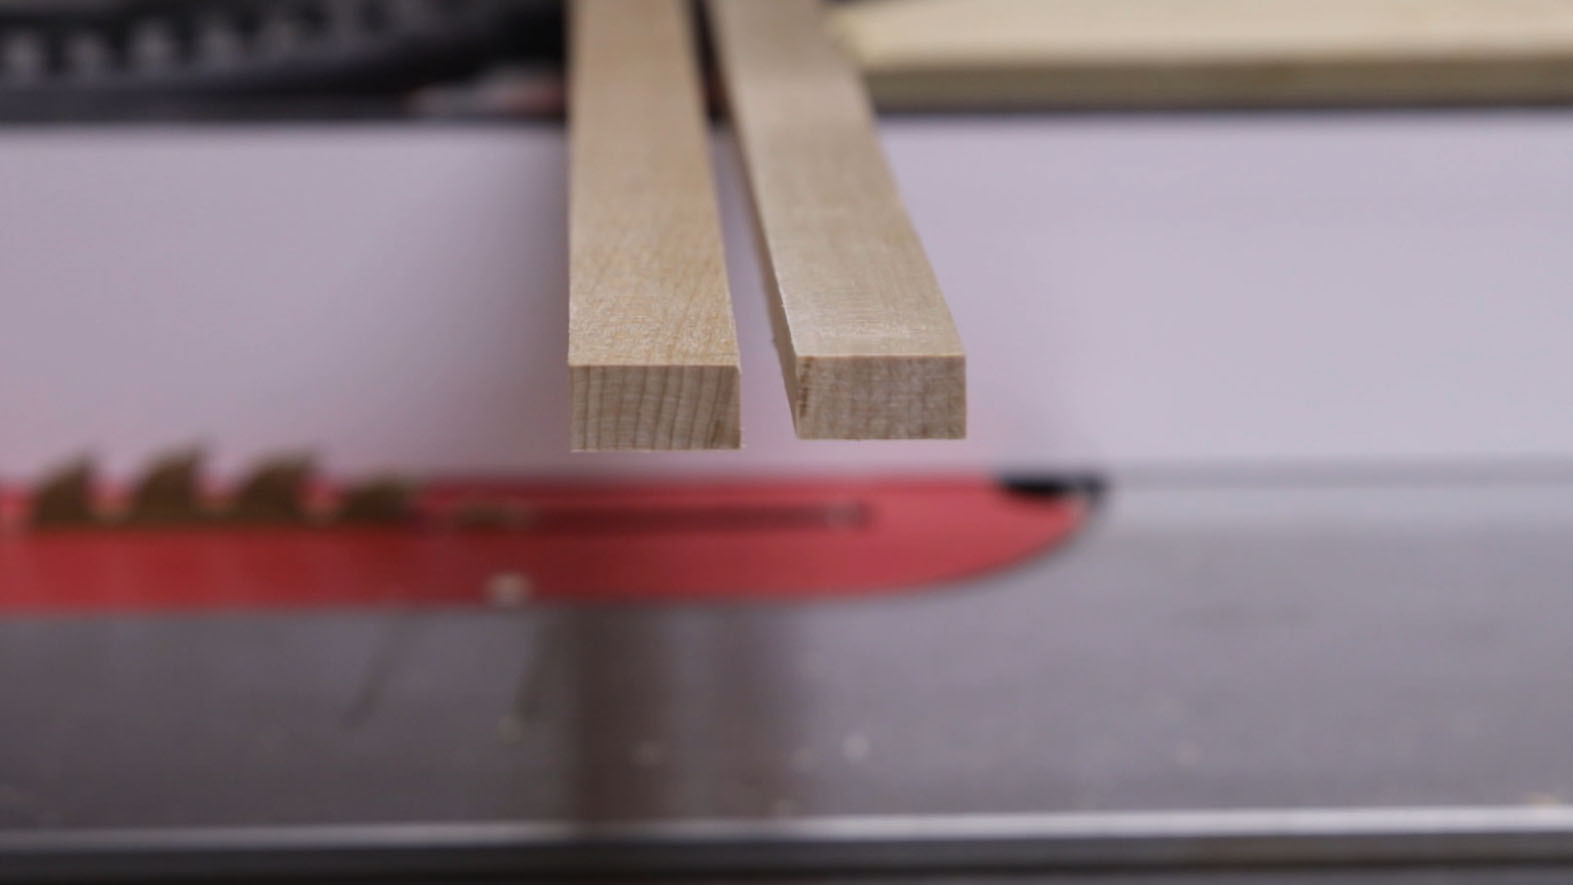
I ended up using wooden runners for the miter track. I made mine out of maple. For the best wooden runners, make sure to find a piece where you can cut it so the grain is vertical. Wood expands with the grain, with the grain vertical, your miter track pieces will expand more up and down. Since the pieces don’t touch the bottom on the miter groove in your saw, there is room to expand. the extra room is for sawdust, and to make sure your sled is resting on the table top, not lifted up slightly. With the grain vertical, yours runners will expand about half as much in width, so that will decrease issues with expansion and contraction. When I finished, and put a coat of poly on the sled, I did put a dab on the ends of each runner. Since wood mostly moves moisture in and out through its end grain, I figured I’d plug this up and slow down that issue even more.
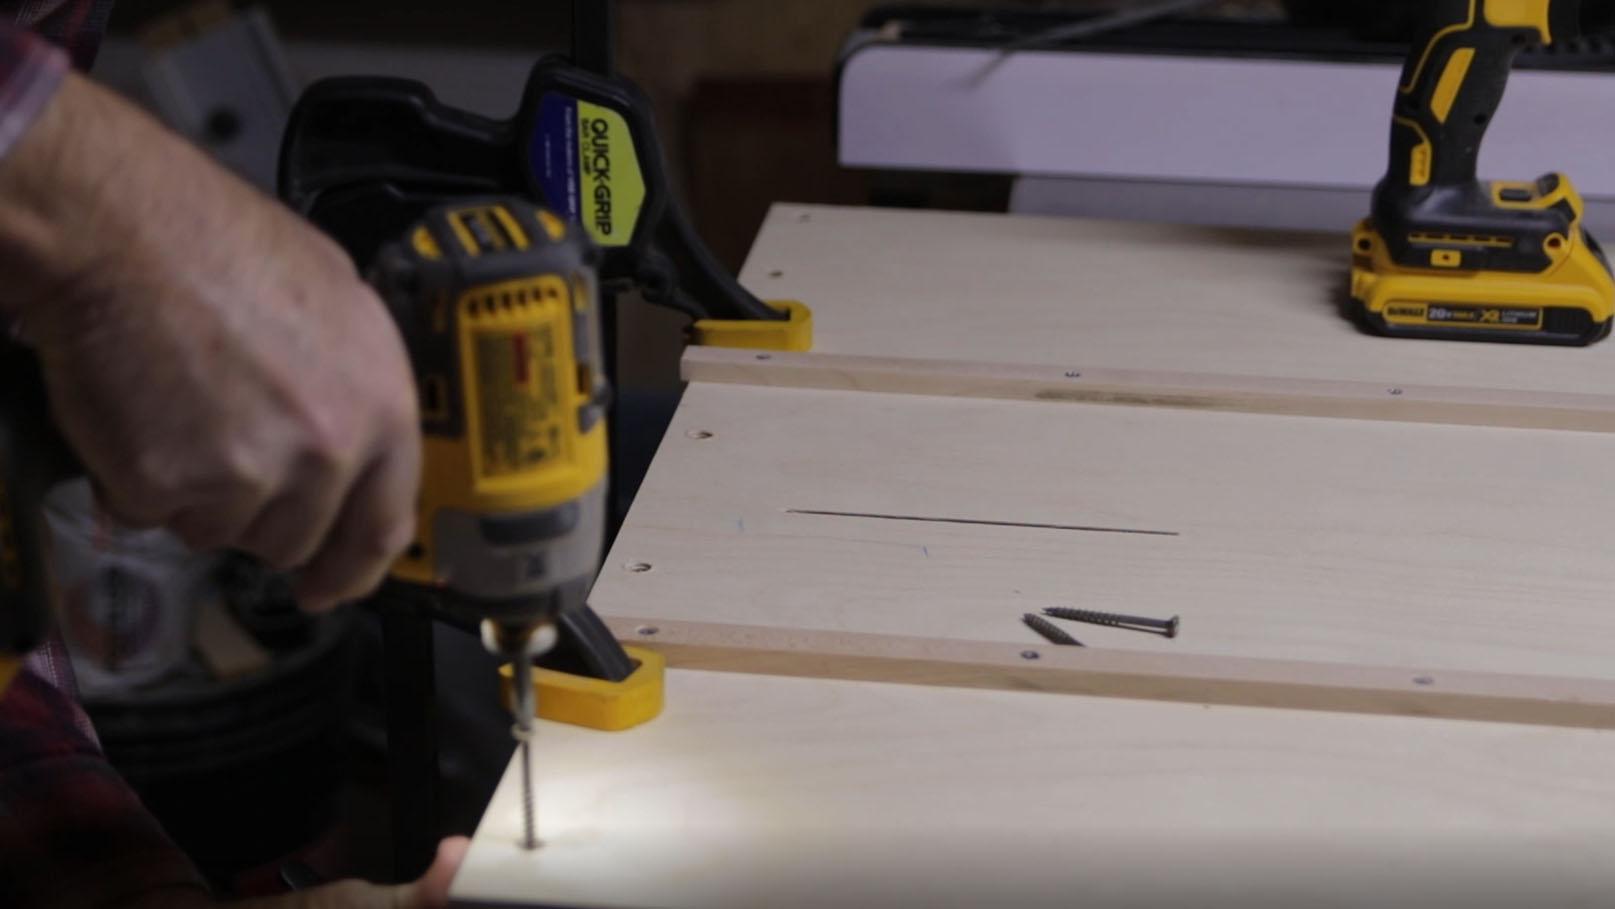
When gluing the runners to the bottom of the sled, put your runners in the tracks, but first put pennies or dimes in the tracks to raise the tracks up so they are proud of the table saw top. I then put on a bit of glue, and laid the sled on top of those, carefully making the front edge of the sled plywood align closely to the table saw top. This isn’t crucial, it will be your front fence alignment later that is crucial. But you do want it fairly close. When that dries, turn that over and screw on the runners. Make sure your screws don’t go through the plywood of course.
I then used the dado blade to cut dados for the Kreg track to fit in. I used a piece of scrap wood until I got the correct depth and width for the track to just fit in. Make sure the track isn’t proud of the plywood sled. It should probably be slightly lower than the plywood. By getting the 48″ track pieces, when you cut off the extra, the leftover pieces will be used for tracks in the miter sled piece. On my sled, that basically left over nothing, I used all the track. When screwing down the track, take some care, Make sure and predrill the very short holes. I had to cut the screws off. I didn’t cut these off short enough, and while they didn’t go through the plywood, they did push out the wood a bit. I removed them, hammered the plywood back flat, and sanded it, then put the shorter screws back in. That worked great.
I cut the back fence profile on my bandsaw, and cleaned that up with a sanding drum attachment for the drill press. This wasn’t working to well, until I remembered on a spindle sander, you have a base, just like most tools. So I got a scrap of plywood, and drilled a larger hole than the drum sander piece, and clamped that to the drill base base, and adjusted it so the sanding drum bottom was recessed in the base. Then I kept the back fence on the base, and tried sanding it again. That did the trick, it really did a much better job sanding that evenly.

Once that is done, you can attach the back fence on permanently. I didn’t use any glue, but just screwed that in from the bottom. Of course countersink your holes. Cut a rabbet in the front fence for the Kreg top track. The top track allows you to use the Kreg swing stop, and the measuring tape on the track. Go ahead and cut the track and screw that to the front fence. Keep the screws away from where the blade will come through. For mine, with the Sawstop saw, I first cut a notch out of the bottom of the top track so the blade will never hit the aluminum track. Since the little blade safety box will be mounted back here, we can leave the screws off near the blade.
The biggest issue I had when building this project was going ahead and cutting through the front fence before I did the 5 cut method and finishing securing the front fence all the way. When I cut through the fence most of the way, I didn’t realize right away, but the front fence was flexing, the left side was pushing towards the back fence slightly, and when I was making cuts for the 5 cut method, it could push back, depending on how tightly I pushed the plywood piece. This of course got me crazy results on the 5 cut method, never getting any closer. I eventually saw the problem, and decided to make a new front fence and try again. I’d already made a couple minor mistakes on the front fence, but fixed them, but figured I’d just start over. I reattached the new front fence with just one screw on each side. This time, I only cut through the front fence enough to cut the thin sheet of plywood all the way through. It was barely a nick in the front fence this time.
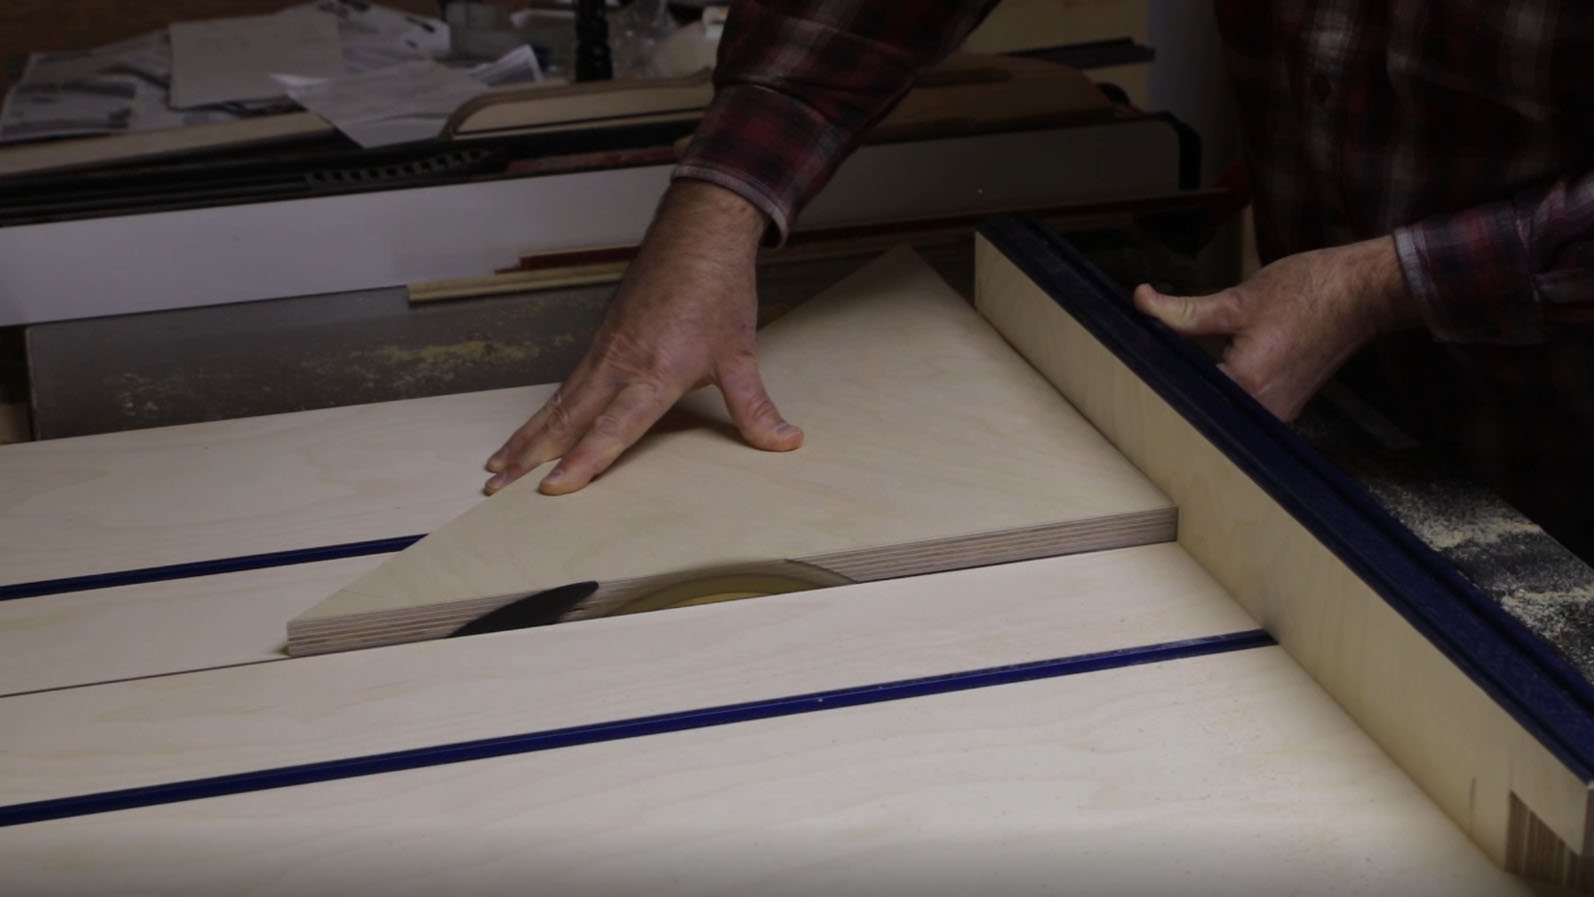
The 5 cut method is a way to test how close your front fence is to perpendicular to the blade. You want this sled to be precise. I used a thin sheet of old plywood I had from an old workbench. The larger the better, mine was about 20″ square (it doesn’t have to be square). If your board isn’t square, use the longest side for your first and fifth cut. Lay it down on the sled to the left of the blade and make a narrow cut. I was cutting very narrow, so I’d still have a piece of plywood when I was done for something else. Label the side next to the saw blade “1”, and make your cut. Now turn the piece clockwise, you want your new fresh cut to be against your front fence. This is what you are measuring. If you went counter clockwise, you wouldn’t be measuring anything. Keep going around until your “1” mark is next to the saw blade again. This time, cut off a piece, it can be an inch, half an inch, just as long as it is enough to measure. Mark the top and bottom of this piece, as that matters for the calculation (don’t move the piece until it is marked). Now get your calipers and measure the top of the piece, and the bottom (nearest the front fence). Take the top minus the bottom and divide by four. Divide the number you have by the length of the fifth cut, then multiply it by the distance between the two screws on your front fence. If your number is negative, you need to adjust the left front fence up, positive, move it down.
(Top measurement – bottom measurement) /4 = difference
Difference * length of fifth cutoff / distance between two screws = total adjustment at left screw
For a negative number, put the corner of a block and clamp it to the base of the sled so the corner is right at the spot your left screw is in for the front fence. Put a feeler gauge in between the corner of the block of wood, and the front fence, and clamp the block of wood in. Now take out the left screw, and remove the feeler gauge and move the left front. fence up until it hits the block of wood. Clamp the front fence in place, and make a new screw hole near the old one, and put a new screw in the new hole. You may want to mark the old hole so you don’t use it again accidentally.
For a positive number, clamp the pointed block against the front fence at the screw position. Remove the screw, and slide the fence back enough to place a feeler gauge in between the pointed block and the front fence. Clamp the front fence down, and then put a new screw in a new hole. Do not reuse the old hole, the screw will pull the fence back to its old location.
Now try the 5 cut method again, do the calculation and see what you come up with. On mine, after I remade the front fence, I had 2.6 thousandths off after adjusting the fence once. I then attached the front fence with more screws from the bottom of sled, and then I tried it one more time just to double check, because of my issues with the loose front fence the first time. It was 2.4 thousandths off. I was happy with that.
If you made your own miter runners out of wood, you may be concerned about the sled binding and not sliding easily. It also might vibrate when sliding. Before you start sanding the runners thinner, get some paste wax and put on the sides of the runners, and on the entire bottom of the sled. Wipe off the excess, and try the sled now. Mine started sliding awesome at this point, with no side to side movement at all.
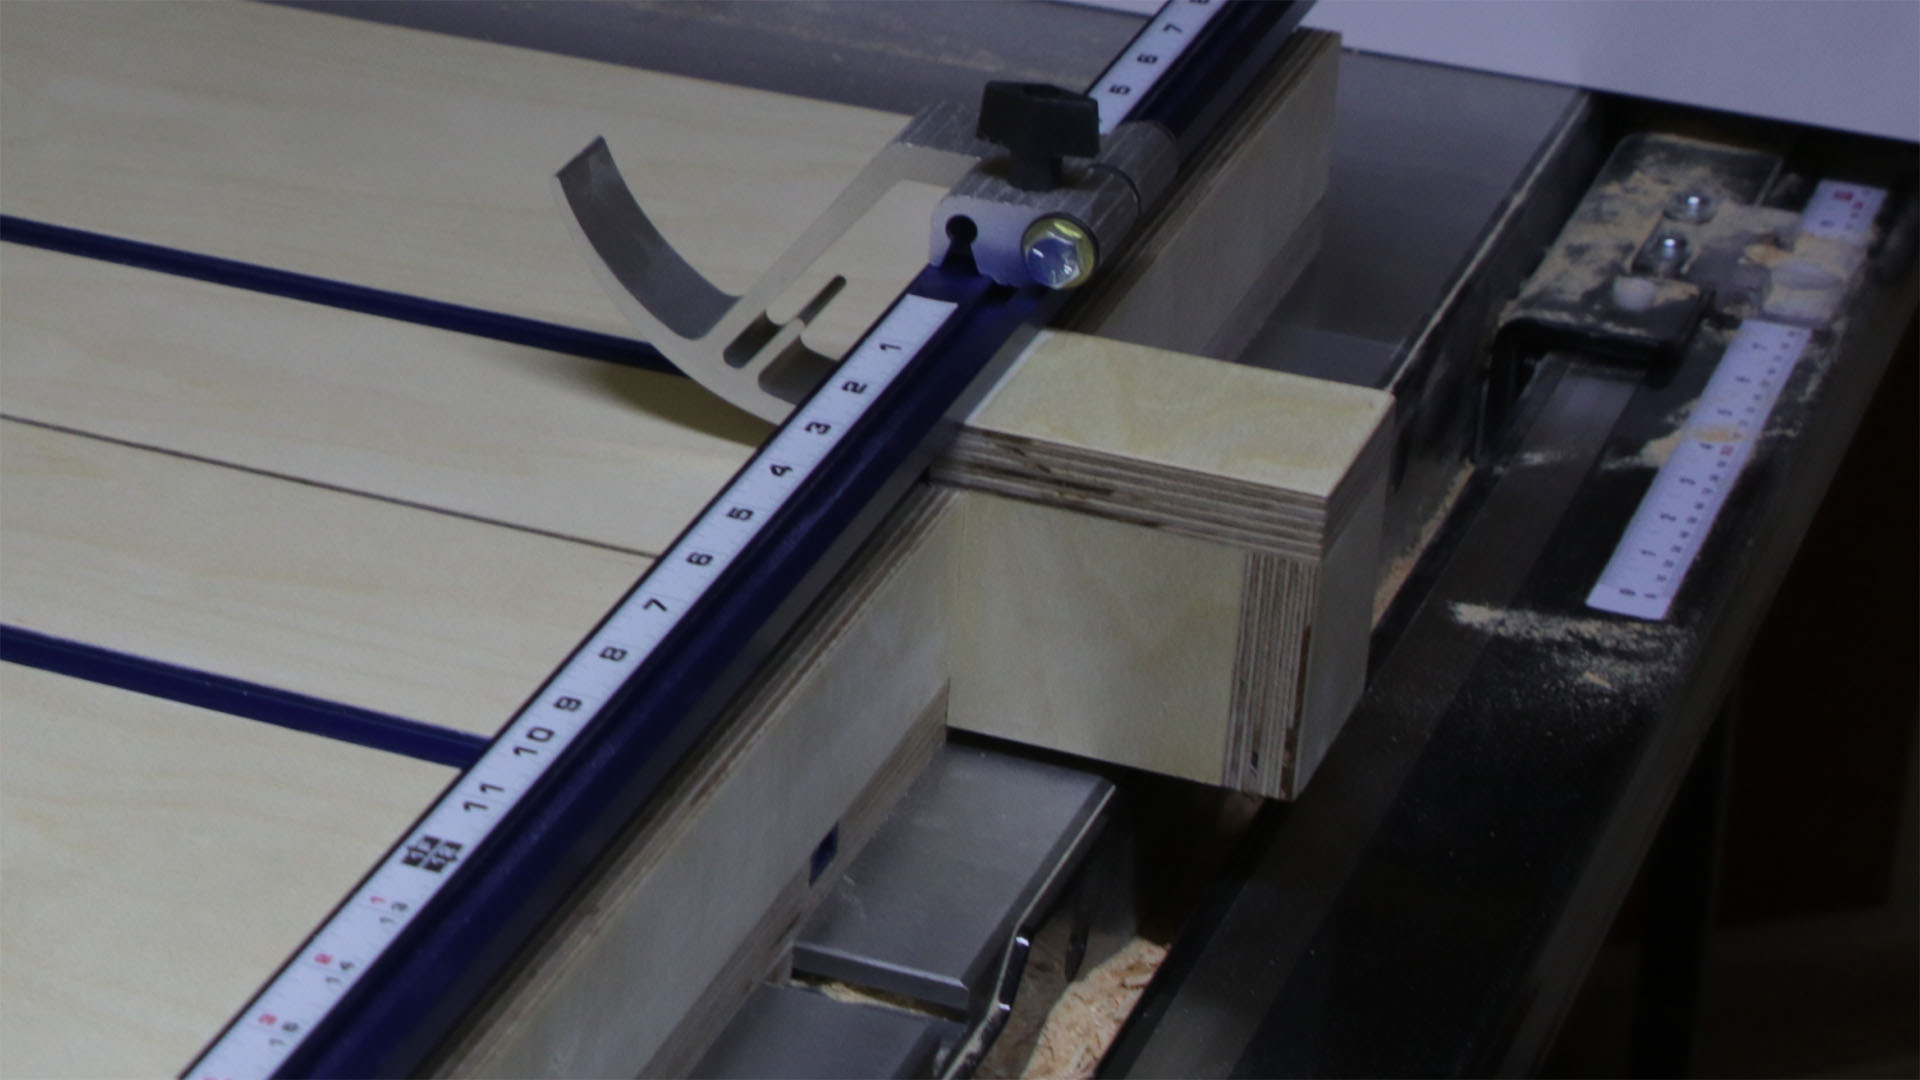
Go ahead and put on the measuring tape pieces. I put the swing block down to the blade cut in the sled (basically zero). I made sure the adjustable clear piece with the red line in the swing block was centered so it could go either way about the same amount. Then I put the first tape on so zero was right under that red line. You can adjust it so it is correct. When you put the tape on the other side, you won’t be able to adjust the little red marker, since it is already adjusted. So you’ll just have to be careful you get the zero mark for that side as closely as you can. Remember first to adjust the swing block to the other side of the blade.
Time for the miter part of the sled. Cut the large triangle to at least rough size. You can make the final cuts on the sled itself. You are going to cut the two edges that will face into the sled. The back edge that goes against the front fence should already have the final straight cut. You may need to shim the edge on the front fence to get it to line up with your pencil mark of the final shape for this first cut.

Using the sled to make your cuts, you can cut out the pieces needed to make the small safety block on the back of the sled that will help conceal the blade from your hands.
Nick painted a red X on the top of his safety guard as a reminder not to put your hand on it. I’ll be doing the same.
Cut the side pieces for the miter sled. Make sure the length is the same, or a tiny bit shorter than the sides of the large triangle plywood piece, You don’t want the back edge proud, or your miter sled part will not go against the front fence like it should. Then cut the dados to fit the track pieces. Remember you’ll be using the left over pieces you cut off for the two main base tracks. These track pieces can be used for stop blocks on the miter sled.
Cut the two tracks to fit in the dados, you will need a 45 degree cut on each end. Make sure you have marked and drilled two 1/4″ holes in the large triangle pice of plywood, so it can be bolted to the track. You can mark the track locations using a square that extends up to where the track is. I marked each side of the track, then drilled one hole between each of the two lines, the same distance from the back edge of the triangle. Then screw those side pieces onto the large triangle plywood piece, so it ends up like this picture:

I hope this article helped. My crosscut sled came out great – thanks to Nick Ferry’s awesome plans!
Parts used in this article:
Kreg Swing stop: http://amzn.to/2pbYVb8
Kreg 1/2″ measuring tape: http://amzn.to/2FDczLb
Kreg 1/2″ left to right measuring tape: http://amzn.to/2FC5WNq
Kreg 48″ mini track (Qty 2): http://amzn.to/2Fytqmn
Kreg 48″ top track: http://amzn.to/2HvgjyW
1/4 20 bolt, 1.25″ long: http://amzn.to/2tK7MpZ
1/4 20 knobs: http://amzn.to/2FAE1gZ
Sanding drum drill press attachment: http://amzn.to/2Hz5ITU
Countersink bits: http://amzn.to/2FGo9FB
Optional parts:
Mini hold down clamp (3″): http://amzn.to/2tNLX8W
Hold Down clamp (3 5/8″): http://amzn.to/2tSdoyD
Hold down clamp (about 6″ (?) and it looks like you’d need to replace the 5/16 bolt with 1/4 20 bolt and knob) http://amzn.to/2tLguEb
Kreg miter track (if you don’t make your own out of wood – Qty 2): http://amzn.to/2Dq0TcR
End cutting nippers (to cut screws shorter): http://amzn.to/2p7SSoS
Big Tools I use:
Table Saw, SawStop PCS: http://amzn.to/2H3ySLb
SawStop Industrial Mobile base: http://amzn.to/2spo6f6
Overarm dust collector: http://amzn.to/2CdfRlR
SawStop 80 tooth blade: http://amzn.to/2Cenngl
SawStop 40 tooth blade: http://amzn.to/2CdLRXh
SawStop Dado safety cartridge: http://amzn.to/2H8e7ye
DeWalt Dado: http://amzn.to/2CeqLrs
SawStop Cast Iron Extension: http://amzn.to/2Cdtj9s
Bench Dog Router Extension: http://amzn.to/2Bpcbkr
Router: http://amzn.to/2H5YK9v
Router Lift: http://amzn.to/2Ejz3En
Band Saw: http://amzn.to/2Eh9pQG
Smaller Tools I use:
DeWalt Drill/Driver set (very nice!): http://amzn.to/2BpDMC7
Clamps: http://amzn.to/2H6tG9t
Bessey REVO Clamps: http://amzn.to/2CeGEOJ
FastCap Glue Bottle: http://amzn.to/2Cf25z5
Chisel set: http://amzn.to/2EVBUAD
Brad point drill bits: http://www.leevalley.com/us/wood/page.aspx?c=&p=42247&cat=1,180
Forstner Bit Extension: http://amzn.to/2CdxB0r
Bubble Level: http://amzn.to/2Elvr50
Sharpening Stones:
DMT 8″ Course (D8C): http://amzn.to/2hZ8AOO
DMT 8″ Fine (D8F): http://amzn.to/2hY4tCT
DMT 8″ X Fine (D8E): http://amzn.to/2Agtofq
DMT 8″ XX Fine (D8EE): http://amzn.to/2BwMziU
Safety Equipment:
Dewalt safety glasses: http://amzn.to/2Dp5ZpW
Dewalt safety glasses Rx-BiFocal (choose your power): http://amzn.to/2FFV2lw
Dust masks N95: http://amzn.to/2HynRRH
Camera Equipment:
80D: http://amzn.to/2EUq5KV
Lens: http://amzn.to/2CdJKCs
GoPro: http://amzn.to/2BnQa5h
Sandpaper:
3M 100: http://amzn.to/2EiI94g
3M 220: http://amzn.to/2H8us5K