

When I bought my SawStop PCS 3hp saw, I immediately got the Bench Dog Pro Max 40-102 router table for it. Since this piece is smaller than the SawStop extension piece, I also got an extra SawStop cast iron piece to fit with it. The extra cast iron piece puts the router miter slots beyond the end of the 36″ rails, so I can slide pieces in and out of the miter slots easily. If you have the 52″ rails, you will need to figure out how you want to fill the empty space that gets made when you remove the extension table.
If you haven’t seen my YouTube video of this, you can view it here. All the rest of the links here are to Amazon, showing you what parts I got. I have a complete parts list at the bottom of this article.
Since I bought the saw and the router table at the same time, I never did install the SawStop extension table. Because it has a wood frame, the holes for it in the rails are lower than what can be used to install the cast iron table pieces. I had to drill 6 holes, with countersinks, to be able to bolt these on (three holes in each rail). Of course, each cast iron piece was bolted to the previous cast iron piece. Bolting it to the rails is not where you are getting the strength from.
My SawStop PCS saw already came with two cast iron wing extensions, rather than the stamped metal ones. I added a SawStop CNS-07-017 Contractor Saw Cast Iron Extension Wing on the right side. These were the only bolts I didn’t have. I purchased four 5/16″ grade 5 bolts that were 1.5″ long, along with the grade 5 nuts for these. I used saw horses below my rails, with a couple 2×2’s and a pieces of plywod to raise the cast iron table to about the right height. This made it easier to bolt on. I used the bolts for the SawStop saw to bolt on these pieces. I marked where there was a hole in the edge of the table, where I could drill a new hole in each rail. I then used a countersink bit to countersink that hole. You will need to use a 16mm or 5/8″ countersink bit. Most of these that I was seeing on Amazon were for wood or softer metals. I found this set that said for steel, but it didn’t last very long. The first two countersinks went well, the next two went OK, and the last two were a lot more work, as the bit was damaged. Make sure you just go far enough, the bolt head should fit just right, if you go too deep, you may end up seeing the bare steel. I was able to do it so I didn’t see the steel, and didn’t need to touch up the black paint on the rails at all.
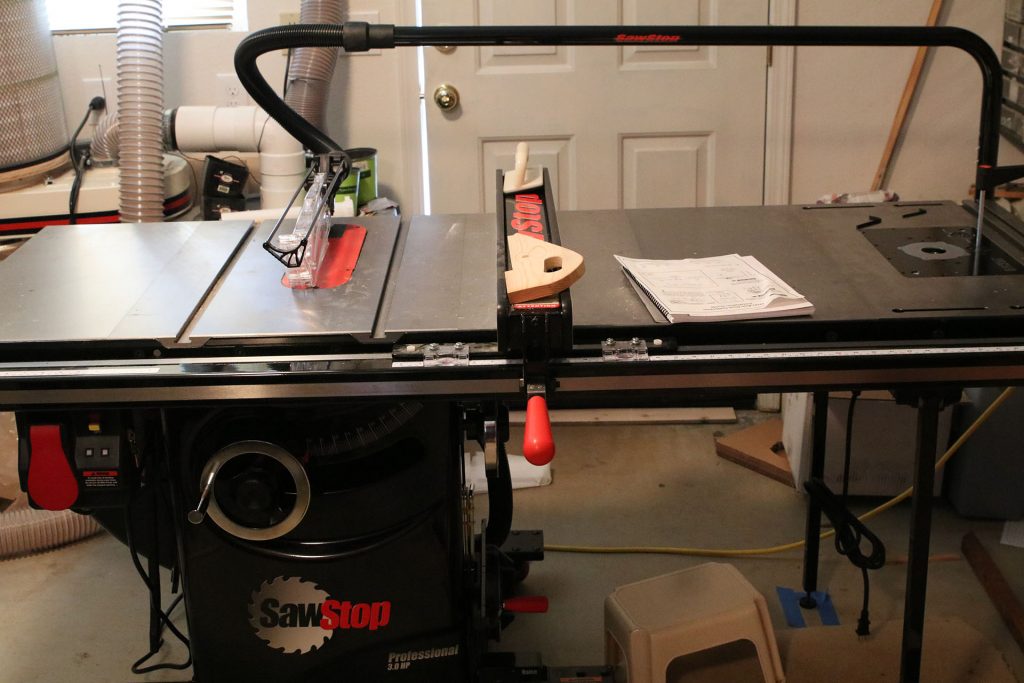
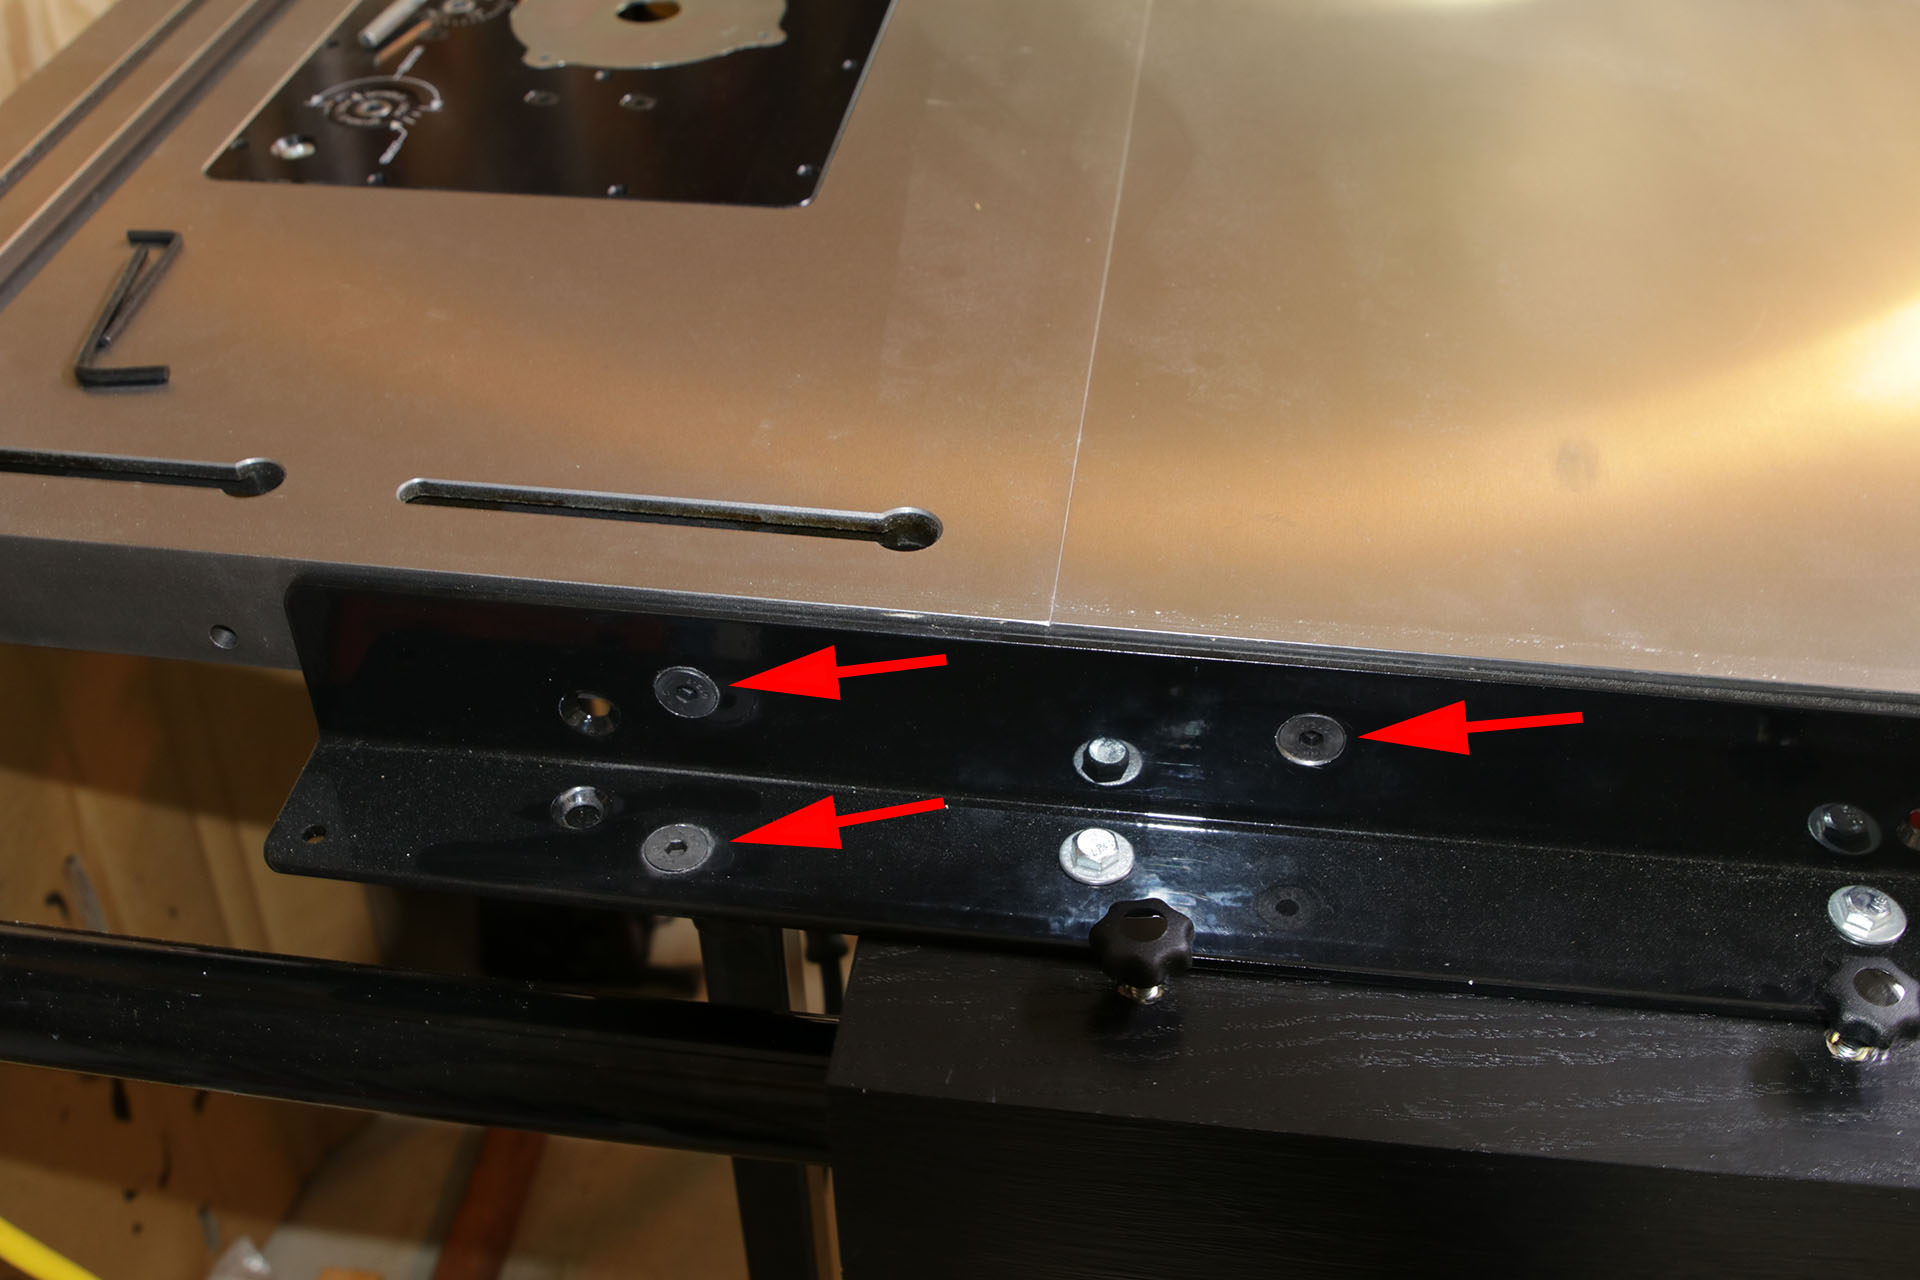
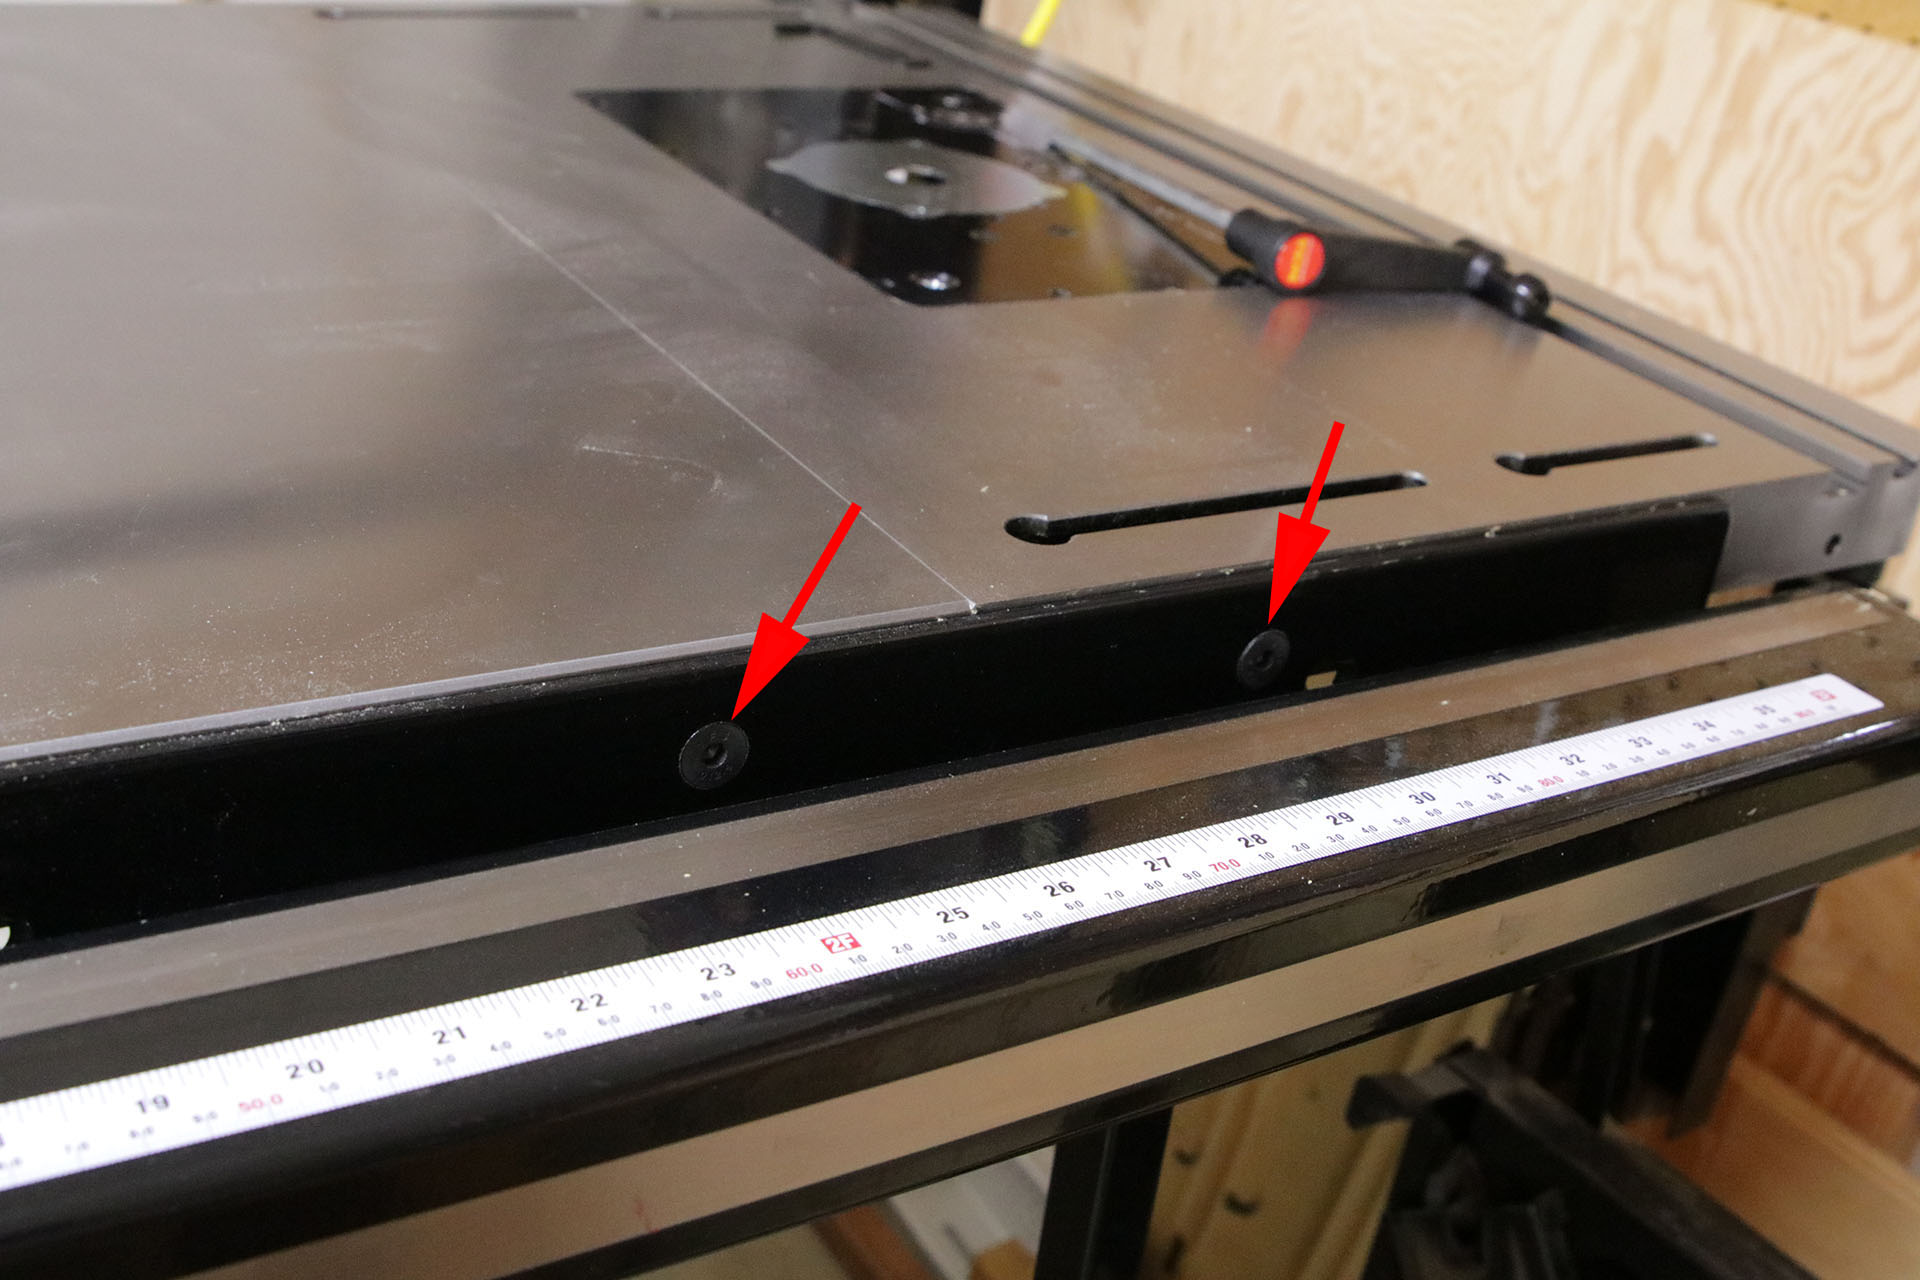
Next was the Bench Dog Tools 40-102 ProMax Cast Iron Router Table Extension. I moved the saw horses down for that, and set it on top of them. I got the 4 bolts supplied with the router table installed, then found a couple small holes on the sides of that near the end to use to bolt to the rails. I used a small drill bit from underneath and drilled thru those, out through each rail. Then I got the right sized drill bit for the SawStop bolts, and drilled from the rail into the router table top, and enlarged those holes. I again used the countersink bit on these, and got the rails bolted to the router table. You should have the four bolts bolting the router table to the SawStop extension table, then one more bolt going through each rail. This is the hole I used to bolt on the legs, so attach a leg on the inside of the router table, then find out where you need to rill the last two holes, one for each leg, going down, so the bracket for the leg can be attached here. I also countersunk these two holes.
I used the SawStop instructions to level the tables so the saw table space end up being flat and level. It was a little tricky, but not too bad.
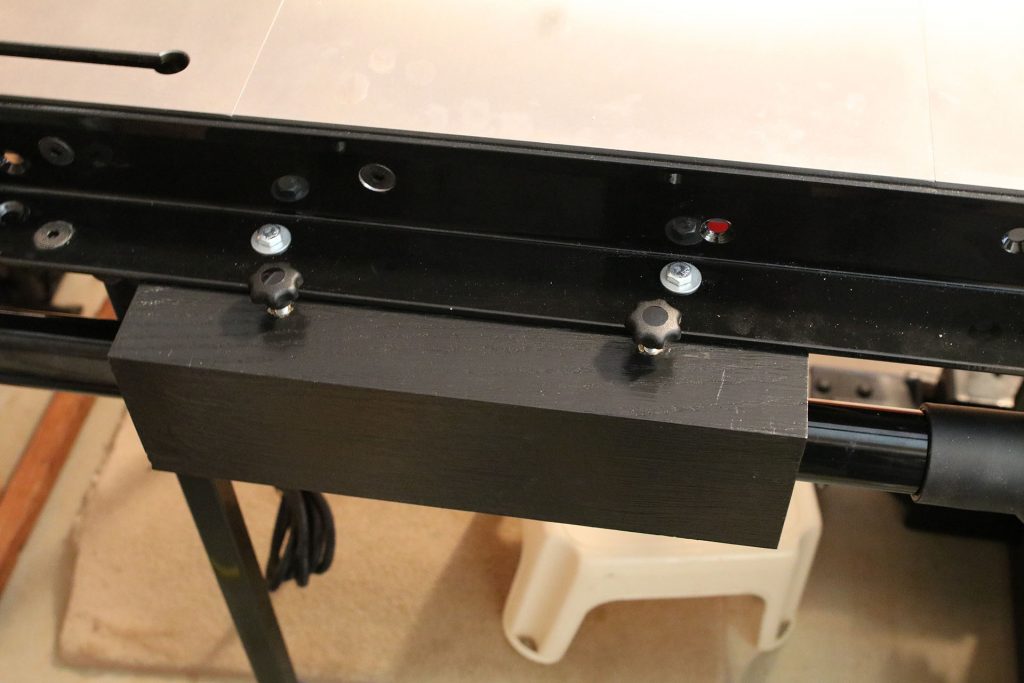
The last piece I changed was when adding the SawStop TSA-ODC Over-Arm Dust Collection Assembly. I wanted to be able to swing this down, out of the way of the router, and I wasn’t sure how to do that without tools, using the brackets that came with the overarm dust collector. So I made a little box that bolts to the rails, that clamps onto the dust collector steel tube. I tried using the method I saw on Paul Marcel’s blog post, but it wasn’t clamping to the steel tube very well. I modified the plywood box, by adding an oak piece for the top, and glued inside the box on each side were two plywood pieces, that allowed for a long oak piece to be slid in between those. I added a couple E-Z Lok Threaded Insert, Brass, Knife Thread, 1/4″-20 Internal Threads, 0.500″ Length (Pack of 25)
into the top of the oak piece, and used a couple Kipp 06220-4A2X20 Black Thermoplastic/Stainless Steel Star Grip, 1/4-20″ External Thread, Style L, Inch, 25 mm Diameter, 20 mm Screw Length, Black Cap Color (Pack of 10)
knobs to screw down onto the oak, then the oak would move down locking the overarm steel bar so it couldn’t swivel. This new design really did the trick, I can easily lock the arm and loosen it in seconds. I bolted this to the rails by using some long 1/4″ – 20 threaded bolts. One thing I did to help give the wood a little more clamping area was to take the white PVC drain pipe, which was also 1.5″, same diameter as the overarm dust collector tubing, and use some double sided tape with a strip of sandpaper on it. I used this to sand until there was a small arc in my little oak strip that move down when clamped, and 180 degrees on the bottom of the box, I did it there. That way when clamped it has a lot more surface area grabbing onto the steel tubing. I didn’t do too much sanding, and it grabs on just great.

That completed the installation of the router table top, which really saves space in my shop, by having the router table built into the table saw. I can lower the bit, and have the router out of the way when using the table saw. One more thing I was worried about though – would the SawStop MB-PCS-IND Industrial Saw Mobile Base Assembly with PCS Mobile Base Conversion Kit be able to lift the saw now, with all the added weight over on one side of the saw? I knew it could handle the extra weight, but wasn’t sure since it was all offset on one side. I pumped it up, and it lifted it fine. Even now with the router lift and router in it, it lifts with no issues, and I can move the saw around the shop easily. I even pushed down on that side, and it has no desire to tilt. Of course, if it did tilt, it would just land on the legs. Don’t try that test if you don’t have your legs installed on the rails yet. I kept that side supported until I had the legs installed.
Make sure you get these two screws installed from the Industrial mobile base to the base of the PCS. These come with the Industrial mobile base, with the two small brackets, and I’m pretty sure this is to make sure the saw doesn’t tip out of the base. Here’s a couple pictures of mine:


Here’s a complete list of parts used. These links go to Amazon, if you use these, it will help support this website, at no additional cost to you when you order from Amazon.com
SawStop MB-PCS-IND Industrial Saw Mobile Base Assembly with PCS Mobile Base Conversion Kit
SawStop TSA-ODC Over-Arm Dust Collection Assembly
Bench Dog Tools 40-102 ProMax Cast Iron Router Table Extension
SawStop CNS-07-017 Contractor Saw Cast Iron Extension Wing
Incra Master Lift II-R Designed for Rockler Tables
PORTER-CABLE 7518 Speedmatic 15 Amp 3-1/4 HP Fixed Base 5-Speed Router
5pc Industrial 5 Flutes Countersink Drill Bit Set Wood Metal Working Chamfer
E-Z Lok Threaded Insert, Brass, Knife Thread, 1/4″-20 Internal Threads, 0.500″ Length (Pack of 25) for wood
E-Z Lok Threaded Insert, Zinc, Hex-Flush, 1/4″-20 Internal Threads, 0.512″ Length (Pack of 100) for plywood
SawStop BTS-P-80HATB 80-Tooth Titanium Series Premium Woodworking Blade, 10-Inch with 5/8-Inch Arbor
I’ll be adding more articles on my under the router table dust box for the router, which will include some shelf and drawers storage, as well as power distribution for the saw and router.
Big Tools I use:
Table Saw, SawStop PCS: http://amzn.to/2H3ySLb
SawStop Industrial Mobile base: http://amzn.to/2spo6f6
Overarm dust collector: http://amzn.to/2CdfRlR
SawStop 80 tooth blade: http://amzn.to/2Cenngl
SawStop 40 tooth blade: http://amzn.to/2CdLRXh
SawStop Dado safety cartridge: http://amzn.to/2H8e7ye
DeWalt Dado: http://amzn.to/2CeqLrs
SawStop Cast Iron Extension: http://amzn.to/2Cdtj9s
Bench Dog Router Extension: http://amzn.to/2Bpcbkr
Router: http://amzn.to/2H5YK9v
Router Lift: http://amzn.to/2Ejz3En
Band Saw: http://amzn.to/2Eh9pQG
Smaller Tools I use:
DeWalt Drill/Driver set (very nice!): http://amzn.to/2BpDMC7
Clamps: http://amzn.to/2H6tG9t
Bessey REVO Clamps: http://amzn.to/2CeGEOJ
FastCap Glue Bottle: http://amzn.to/2Cf25z5
Chisel set: http://amzn.to/2EVBUAD
Brad point drill bits: http://www.leevalley.com/us/wood/page.aspx?c=&p=42247&cat=1,180
Forstner Bit Extension: http://amzn.to/2CdxB0r
Bubble Level: http://amzn.to/2Elvr50
Sharpening Stones:
DMT 8″ Course (D8C): http://amzn.to/2hZ8AOO
DMT 8″ Fine (D8F): http://amzn.to/2hY4tCT
DMT 8″ X Fine (D8E): http://amzn.to/2Agtofq
DMT 8″ XX Fine (D8EE): http://amzn.to/2BwMziU
Safety Equipment:
Dewalt safety glasses: http://amzn.to/2Dp5ZpW
Dewalt safety glasses Rx-BiFocal (choose your power): http://amzn.to/2FFV2lw
Dust masks N95: http://amzn.to/2HynRRH
Camera Equipment:
80D: http://amzn.to/2EUq5KV
Lens: http://amzn.to/2CdJKCs
GoPro: http://amzn.to/2BnQa5h
Sandpaper:
3M 100: http://amzn.to/2EiI94g
3M 220: http://amzn.to/2H8us5K
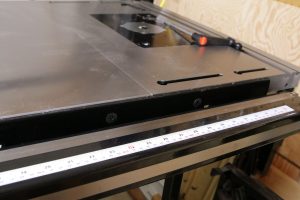
there seems to be 2 photos missing of the new holes drilled?
Thanks for the heads up, I’m not sure what happened there, but I got it updated. I also added some red arrows pointing to the new bolts and bolt holes. Also, I added an option to click on the image to see the full sized image. I hope this helps.
Your video refers to a future discussion of the under table dust collection for the router. I also have the bench dog table attached to my sawstop and I’ve been trying to figure out the best way of handling dust collection. What have you done? Thanks
Rick, I haven’t gotten there with it yet. I am almost done with the SketchUp design for it. I have been working on my workbench. It’s been so hot this summer, I didn’t get a lot done, but it has cooled off now. I will definitely be sharing the under table dust collection, and storage for: blades, inserts, etc. Maybe in the meanwhile I can share a short video of how the Sketchup plans are going (let me know if you’d be interested). That would at least show you what I am planning for mine. The shop has also been a bit clogged with all the lumber for the workbench, so it’s been a bit harder to work in there.
I am getting ready to set my PCS 36″ saw up the same way. I really appreciate you taking the time to outline what you did to make it work, it is a huge help to know what will need to be done. I purchased the Incra CleanSweep dust shroud for my setup. I am thinking I can make it work by attaching a piece of plywood or MDF under the router table and then screwing to that.
Also, you do not list the four (4) 5/16″ x 1.5″ long grade 5 bolts and grade 5 nuts you mention at the start of the article in the lest at the end.
Sorry for the delay in getting back to you. I could not find those grade 5 bolts on Amazon to give a link. I just got mine at the local big box store.
You’re welcome. I did it because I only saw one or two articles on doing this. And not one of the articles mentioned if the industrial mobile base would be able to handle the load of all the extra cast iron. It does! I’m still planning on coming up with an under the saw dust collector and some shelves for the router. I’ve been working on my new workbench, and just haven’t gotten back to that project yet.
My question concerns how difficult it was to make sure your new drilled holes lined up so that the tables were perfectly aligned/flat? I’ve thought about doing this quite a bit but I’m worried if I’m just a tiny bit off while drilling those holes then the table won’t be perfectly flush. Did you drill them in a way that allows some play to get them to flush up while bolting together?
Maybe I’m confused and don’t quite understand how it all comes together. Having said all that, at this point I might as well wait and get the Sawstop version of all this. Seems that it’s going to be priced fairly close to what it cost you here (maybe even less?).
When I did this early in 2017 (early March I think), SawStop hadn’t announced their new router table, so I didn’t know about it yet. I’m not sure I’d have waited (over a full year would have been too long to wait for me), but at this point, I might wait for that. The holes in the router table (or the ones you’ll need to drill) are a little larger than the bolts. That gives you room to make adjustments to get the tables aligned just perfectly. I was worried about the same thing, and was trying to make sure I got the holes drilled as best I could. But I sort of also knew, they’d most likely be a little off. Obviously you can’t move the bolts with their countersunk heads, but you can move the table, since the hole in the table is slightly larger. Of course, if SawStop had those drilled already for me, it would have been far easier. As it was, it wasn’t all that difficult to do the job, and I’m very happy with the whole thing.
I just checked and see SawStop is saying early 2018 for pricing and availability. Of course announcing availability in early 2018 doesn’t mean that’s when it will be available necessarily.
I do want to move onto my project for under the saw dust collection for the router and some drawers and shelves and storage space. It will be nice as I’m going to do the power distribution thing where I run 240 to the saw with one cable, but I’ll split out a 120 volt line for the router to use, so I won’t need to run a separate line for the router. I’ve been working hard (and slowly) on my workbench. The top is a struggle for me, since it won’t fit in the planer or jointer, and I was using a hand plane that I couldn’t get to stop having tear out. I’m currently putting tenons on the stretchers and legs, then will move to the mortises and should be ready to put the base together and get the top on, hopefully soon.