

I made a wooden mallet out of maple, to use when chiseling mortises for my workbench. I found some plans online and used those as well as some notes that Paul Sellers had on his mallet, and the Blue Spruce Joiner’s Mallet. This article in addition to my YouTube video, which shows many details in how this was built. So not all details are in this article, use my YouTube video, and the link above for the plans I found.
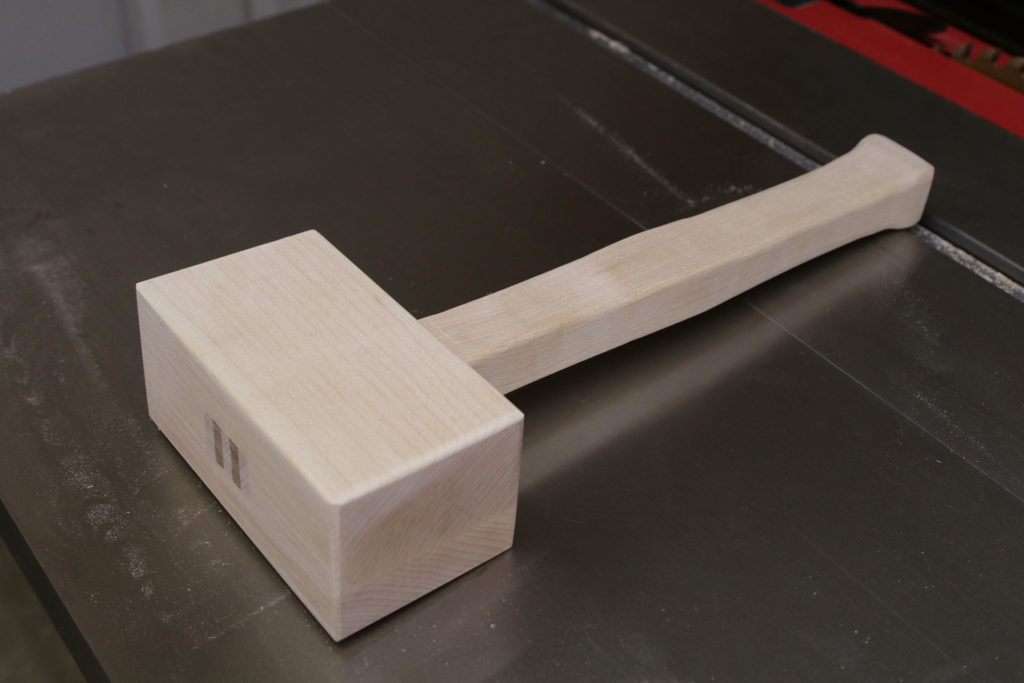
The online plans had a head much smaller than Paul Seller’s, so I adjusted the head size up some, to 5.5″ long, 3″ tall, and 2.25″ wide. The exposed part of the handle is 10.5″ long, it is 1.25″ wide and 1″ thick.
I went ahead and filled the 3/4″ thick center portion with lead, as you can see in my YouTube video, I drilled two 7/8″ holes in each side. The angle on the head face is two degrees. I also angled the inside of each half of the center piece two degrees, which leaves room for the wedges to go in. I cut the two slots in the handle with the table saw, with a simple jig I quickly made to help hold the handle in place while making that tall cut. So each slot is 1/8″ wide, the width of my saw blade. When you make you wedges, make the them length of the slot you cut, plus a little more that you can cut off. Leave about 1/8″ near the shoulder of the handle, so your slots do not go past the bottom of the head, that will keep those from splitting. Mine were around than 3″ long, 1/8″ thick on one side, and .225″ thick on the other side. The wedges were 3/4″ wide, the same width as my center section of the mallet. Check out the plans online link I gave above, which does a great job of explaining how it is made. I calculated the thickness of the top of the wedge by using an online calculator for triangle angles, using the 2 degree angle, and the approximately 3″ length (I think mine was 2 and 27/32″), and it gave me .099 (or .1″) as the width to add to the 1/8″ thick notch I cut in the handle. This gives you a wedge that doesn’t really put pressure on the head, but you will glue in, spreading the tenons apart, so that the head can never fly off. I used a darker wood, I think it was mahogany, to give the wedges some contrast to the rest of the mallet which was all maple.
I filled the 7/8″ holes I put in the center part of the head with lead shot and epoxy. I may not have needed the extra weight with the larger head. I’ll see after I use it to make some mortises as to how well it works.
A word on using epoxy. When you go to one of the box stores, they seem to always carry Loctite. I’ve bought a lot of that over the years, and learned it is always terrible epoxy. Bubble gum or a post it note would hold better. I found this epoxy on Amazon, and it’s been working great for me. Anything but Loctite.
After gluing the head together, I cut the handle blank. Most handles seem to be roughly 1 x 1.25″, and around 10″ long or so, not including the part of the handle going into the head. I made my blank a little larger to make a larger flare at the bottom of the handle to make it less likely to slip out of my hand. I then followed the outline from my hammer and hand ax, to get the gentle curves in the handle, to better fit my hand. After cutting away most of the waste on my band saw, I then sanded the edges off until the handle fit my hand comfortably. It didn’t take much before it felt great, so it was easier than I thought.
I also rounded over the edges on the head of the mallet slightly. I could have rounded them more, that might even look better.
I made a simple wedge jig out of 3/4″ pine board, so I could fit my 3/4″ mahogany wedge material in it, and cut some wedges. If you have a band saw, you can use the same type jig as pictured below, and leave off the plywood guard I glued on, and just run the jig along the fence on the band saw. This seems a bit safer, I’ll have to try it next time on the band saw.


I used a flush cutting saw to cut the excess off the top of the handle, along with the excess wedge material. This saw was new to me, and worked great.
I’ll be putting on some boiled linseed oil as a finish – then call it done. I may make a couple more mallets in the future, maybe turning one on my lathe, and maybe making one out of solid maple, without gluing the head from pieces. The solid head one I’d have to chisel out the mortise for the handle, where on this one, you glue up pieces so the mortise is made for you without chiseling anything.
I made a second video, where I branded and put boiled lindseed oil on the mallet:
Products I used:
Klean-Strip Green QLO45 Boiled Linseed Oil, 1-Quart
Franklin International 1414 Titebond-3 Ultimate Wood Glue, 16-Ounce
Lead Shot Balls 7.5 bag 1 lbs (16 oz) (453 gm) (0.094″) (2.39 mm) Dia
EPOXY RESIN CRYSTAL CLEAR 16 oz Kit. FOR SUPER GLOSS COATING AND TABLETOPS
Hyde Tools 45395 Heavy Duty Rubber Sanding Block
Robert Larson 720-3000 Flush Cutting Saw
Equipment used: