I was having trouble using a hand plane to flatten my workbench top. The plane was having tear-out, and despite trying a backbevel, the blade continued to tear out. This is my first time trying a hand plane, I basically don’t know what I’m doing. I decided to try the router sled method to flatten it.
The router sled in my case consists of two 2×6’s and two 2×4’s. A 2×4 and 2×6 get clamped to each side of the workbench top, 2×6’s on the outside. I then made a router sled out of 3/4″ plywood.
I started by ordering a 1.5″ bit for my router. This wide bit (relatively speaking), allows fewer passes across the width of the workbench to do the entire length.
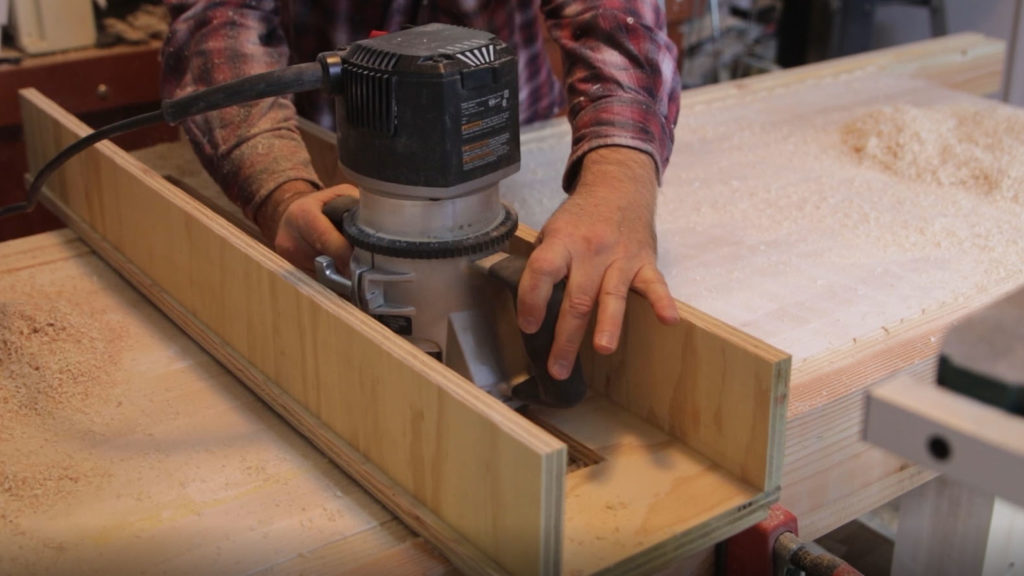
I then made a router sled out of plywood. Make this long enough so it will span your workbench, plus the side board you clamp on. I made the base wide enough for my router base, plus a little room, about 1/16″ for the router to smoothly slide back and forth, plus the width of a piece of plywood on each side. Cut two pieces of plywood the same length, but about 4-5″ high for the sides of the router sled. The bottom edge should be very straight – we want these pieces to support the bottom piece of plywood so it doesn’t sag with the weight of the router. Glue on or screw the sides on, making sure your router will slide all the way back and forth.
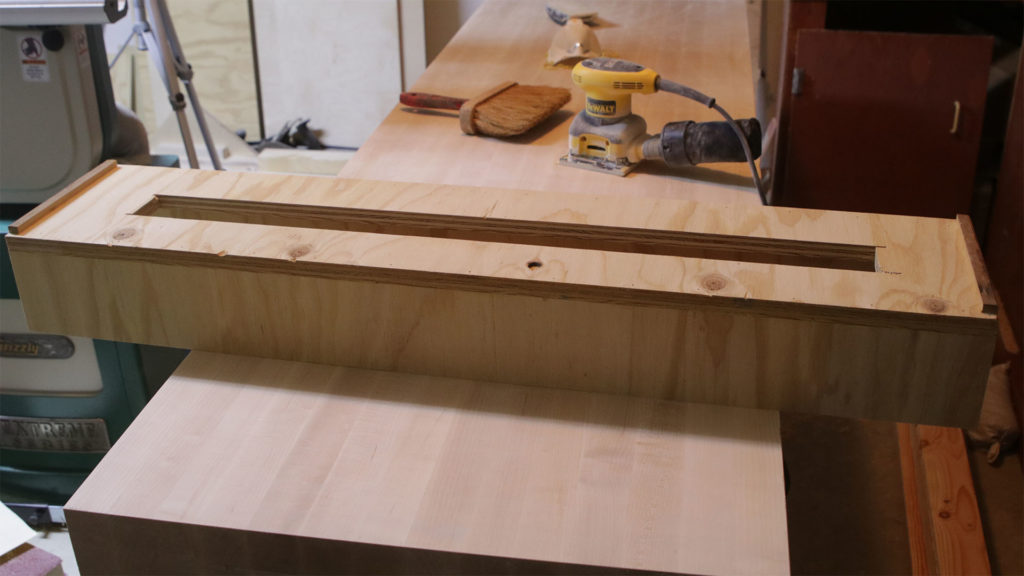
I then cut the slot down the middle, about 2″ wide, with the table saw. I let the base move down onto the blade, and cut two slots that didn’t go all the way to the ends. This slot needs to be a bit wider than your benchtop. If your workbench is 24″ wide, make the slot maybe 26″ long. I then made the side cuts and finished the slot with a jigsaw.
I glued on two pieces of wood on the bottom of each side. These stops will help keep the sled from sliding off the 2×6’s as you go across the bench, one pass at time. If it slips off, the bit is going to suddenly dig deeper and gouge the top – not a good thing!
I clamped a couple board onto the legs below the top, about the height that when I set a 2×6 on them, the 2×6 would be about 1/4″ proud of the top. I used the planer to smooth one side of the 2×4 I put against the workbench top, so that the rough 2×4 wouldn’t be making impressions on the side of my workbench top. Of course, the top edge of each 2×6 should be very straight. I put mine thru the jointer and got these flat and straight.
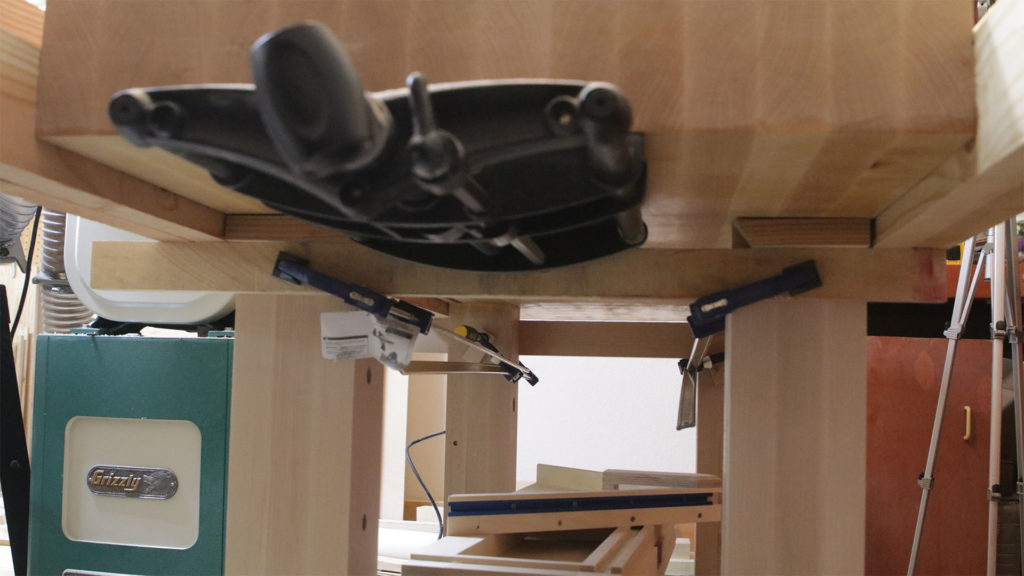
Then set a 2×4 on each side of the benchtop, followed by a 2×6. If you put the cross pieces under the bench at the right height, the 2×6 should just be slightly above the workbench top. Now use three clamps, one on each end, and one in the middle to hold the 2×4’s and 2×6’s securely to the top. The two braces clamped under the bench aren’t necessarily needed, but I did use them to put blocks under the 2×4’s to help hold them up to the level of the top while I tightened the three clamps holding the 2×4’s and 2×6’s on.

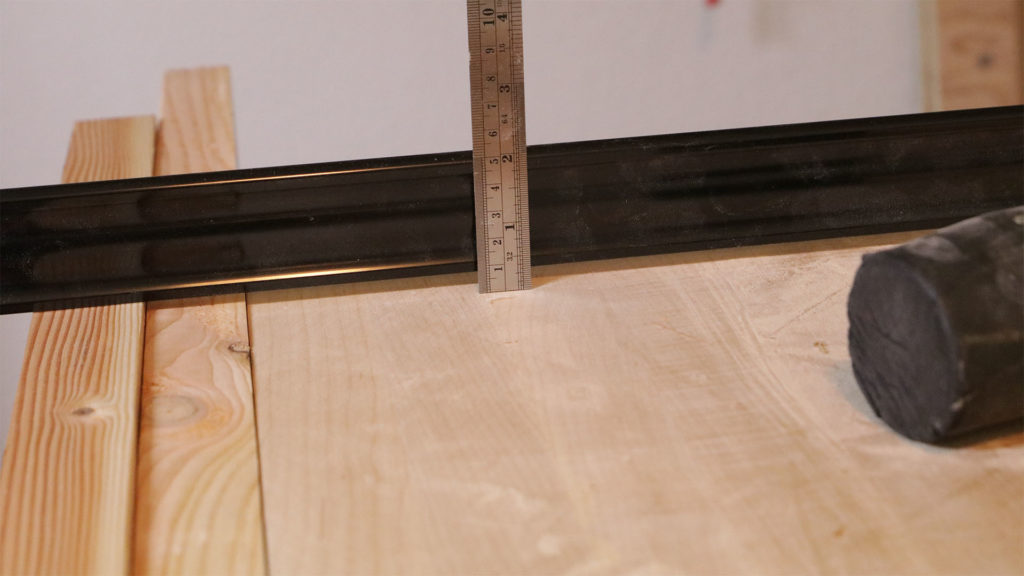
After you get the boards clamped up, you can measure and get the 2×6’s evenly up about 1/4″ or so. It can be any height above the top, it doesn’t really matter, except you don’t want it too high or your boll will have to extend too far to reach the top.
You can adjust the boards with a rubber mallet, to hit them a bit lower or higher. This should move them in the clamps a bit.
It isn’t as critical that your workbench is level, as it is flat. This next step is what will make it flat. I got some wire and stretched diagonally across the 2×6’s and across the top, attaching to the 2×6’s with sheetrock screws. Make these as tight as you can get them. You want these wires to just barely touch in the center. The upper wire needs to be elevated at each end the height of the wire, so clips off a couple short pieces of the wire, and put under it at each end.
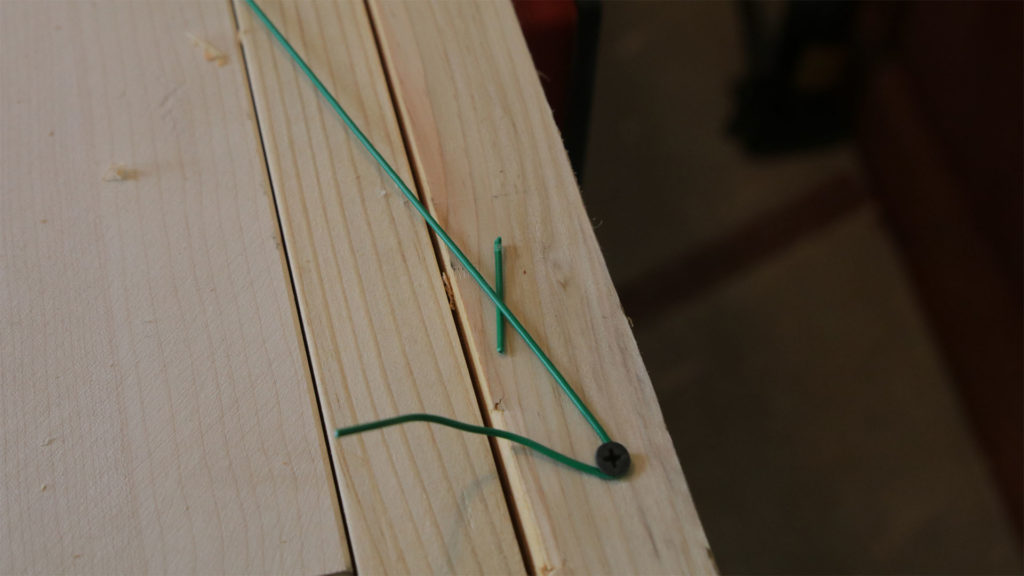
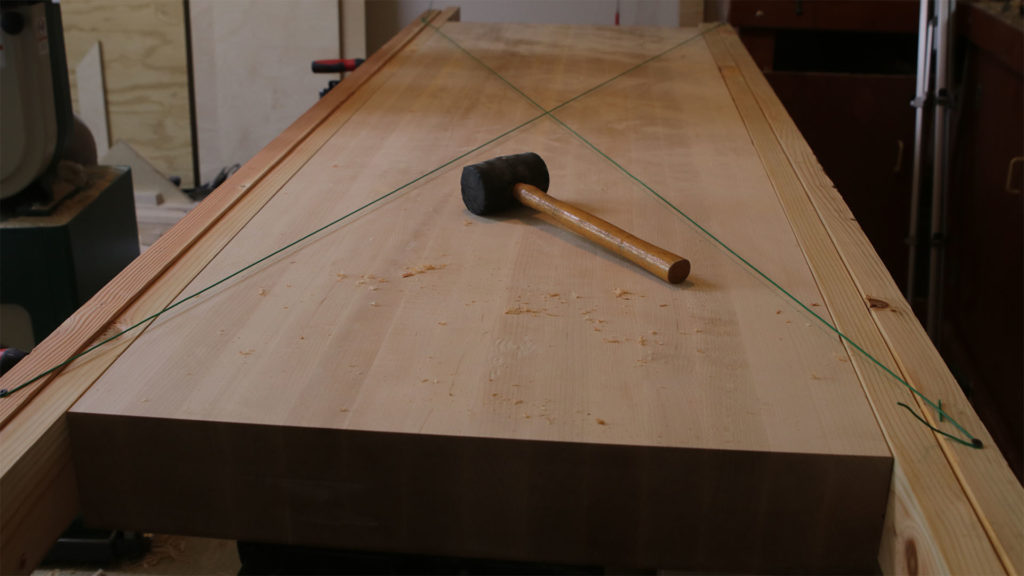
Tap the ends of the 2×6’s, a little lower or higher until they just barely touch. If you push the bottom wire down, the top wire should not move, if you push the top wire up, the bottom wire should not move. If you push down on the top wire, the bottom wire should start moving at the exact moment the top wire moves. When you have this set, make sure your clamps are all tight, at this point you don’t want those boards slipping or moving at all. You can remove the wires now.
Now find the lowest spot on the top. I used a precision straight edge, and a steel ruler to check for the lowest spot. Since I was going to be removing a thing layer off the entire top, I just wrote these in pencil where I measured. Then set the router sled there, place the router in it, and adjust the height of the router until it just touches the top.
The setup is the most important part. Now it is just making pass after pass across the top to remove a thin layer of wood. I made sure and set the speed on my router a little slower for this large bit. The top speed is listed on the container for it. I then started the air filtration, put on my dust mask, and hearing protectors, and started in on it. Make sure you keep sawdust from getting under the sled. I lifted that up and swept under it often.
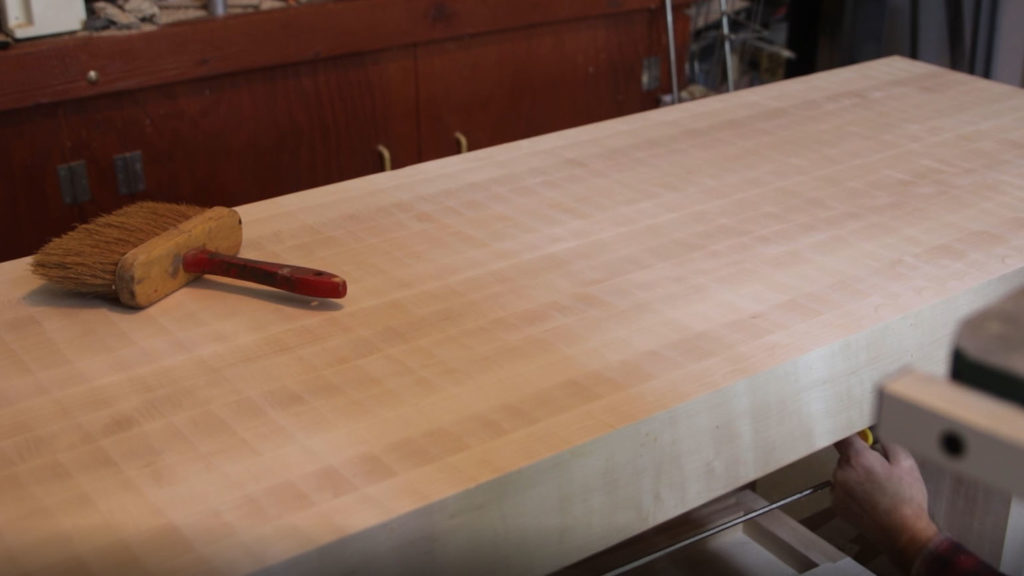
It went rather well. There was slight lines in the top from the bit I could see. Some light sanding removed most of that, and it now looks awesome. I’m glad I picked the router sled method. The 2×6’s and 2×4’s were re-purposed for some lumber racks, and I saved the router sled part for another project, another day.
Parts used in this build:
Router bit: http://amzn.to/2psaxHa
Bessey REVO Clamps: http://amzn.to/2CeGEOJ
Router: http://amzn.to/2H5YK9v
Precision straight edge: http://amzn.to/2FS8TK0
Steel Ruler: http://amzn.to/2IEGDrG
Big Tools I use:
Table Saw, SawStop PCS: http://amzn.to/2H3ySLb
SawStop Industrial Mobile base: http://amzn.to/2spo6f6
Overarm dust collector: http://amzn.to/2CdfRlR
SawStop 80 tooth blade: http://amzn.to/2Cenngl
SawStop 40 tooth blade: http://amzn.to/2CdLRXh
SawStop Dado safety cartridge: http://amzn.to/2H8e7ye
DeWalt Dado: http://amzn.to/2CeqLrs
SawStop Cast Iron Extension: http://amzn.to/2Cdtj9s
Bench Dog Router Extension: http://amzn.to/2Bpcbkr
Router: http://amzn.to/2H5YK9v
Router Lift: http://amzn.to/2Ejz3En
Band Saw: http://amzn.to/2Eh9pQG
Smaller Tools I use:
DeWalt Drill/Driver set (very nice!): http://amzn.to/2BpDMC7
Clamps: http://amzn.to/2H6tG9t
Bessey REVO Clamps: http://amzn.to/2CeGEOJ
FastCap Glue Bottle: http://amzn.to/2Cf25z5
Chisel set: http://amzn.to/2EVBUAD
Brad point drill bits: http://www.leevalley.com/us/wood/page.aspx?c=&p=42247&cat=1,180
Forstner Bit Extension: http://amzn.to/2CdxB0r
Bubble Level: http://amzn.to/2Elvr50
Sharpening Stones:
DMT 8″ Course (D8C): http://amzn.to/2hZ8AOO
DMT 8″ Fine (D8F): http://amzn.to/2hY4tCT
DMT 8″ X Fine (D8E): http://amzn.to/2Agtofq
DMT 8″ XX Fine (D8EE): http://amzn.to/2BwMziU
Safety Equipment:
Dewalt safety glasses: http://amzn.to/2Dp5ZpW
Dewalt safety glasses Rx-BiFocal (choose your power): http://amzn.to/2FFV2lw
Dust masks N95: http://amzn.to/2HynRRH
Hearing protection: http://amzn.to/2FPrV3v
Camera Equipment:
80D: http://amzn.to/2EUq5KV
Lens: http://amzn.to/2CdJKCs
GoPro: http://amzn.to/2BnQa5h
Sandpaper:
3M 100: http://amzn.to/2EiI94g
3M 220: http://amzn.to/2H8us5K


Hi thanks for writing this. I am trying to do the same thing.
The bit I don’t get is the string or wire.
Imaging numbering the corners of the bench clockwise A B C D. The wires run from A to C and B to D. You could get the wires to just touch if you make A very high and C very low – but the top won’t be flat.
Am I right to assume that it all depends on how flat and level you rails are? So if long rail A B is very level and you don’t touch it then that is your reference. Which o assume is done with a spirit level. Then why not just carry on with the spirit level ? And how do you get your original beams (2by6) in your case level enough…
Any help much appreciated- try as I might I can’t make sense of it.
Thanks
Colin
I’m no expert at this, it was my first time doing it – but mine turned out great. Let me do my best to explain. First joint the edges of the 2×6’s on one side (which will be up), so the boards are straight. After clamping the 2×6’s (or whatever you use) to the front and back of your bench, you could use a level on the 2×6’s to get them in and initial position, like you are saying, to make sure one of the rails is level, maybe the front of the bench lets say. Or you could put that rail a certain distance higher than the bench, a 1/4″ or 1/2″ or so above each side of the bench. If you do it that way, that could be your reference rail, and then we will just move the 2×6 on the back side of the bench to make the wires straight. When adding your wires, the top wire needs those little pieces under both ends, to raise the wire up above the bottom wire. So if wire AC is the bottom wire, put a little piece of wire on top of the 2×6 at point B and at point D. You can then measure (if you used a level and didn’t measure) point C lets say, if the front is DC and the back is AB. Now make the back 2×6 point B this same height, and then make point A on the back approx the same height – but doesn’t need to be exact yet, lets see what the wires say. Again now we will leave the front rail DC as a reference point, we’ve measured or used a level. My bench was pretty level already. The legs exactly the same length and the the top about the same width (the top is probably where an unknown levelness could creep in, as I couldn’t plane the entire top). So I just measured my 2×6 board DC, to a certain height, but I like your level idea to get DC level and the reference board. Now after stringing the wires, just move the back 2×6, AB to get the wires to just meet. When adjusting your router bit, extend the bit far enough to meet the lowest point on your top, as you want to remove the least amount of material as it possible. I’d read somewhere it didn’t matter if the bench top isn’t 100% level, that it was more important that it be flat. Mine is flat, and this method worked great for me. Hopefully this helps, again, I’m no expert, this is just my journey thru the process, and I’m very happy with how mine came out. If you have any more questions, let me know, I wish you the best on your bench!