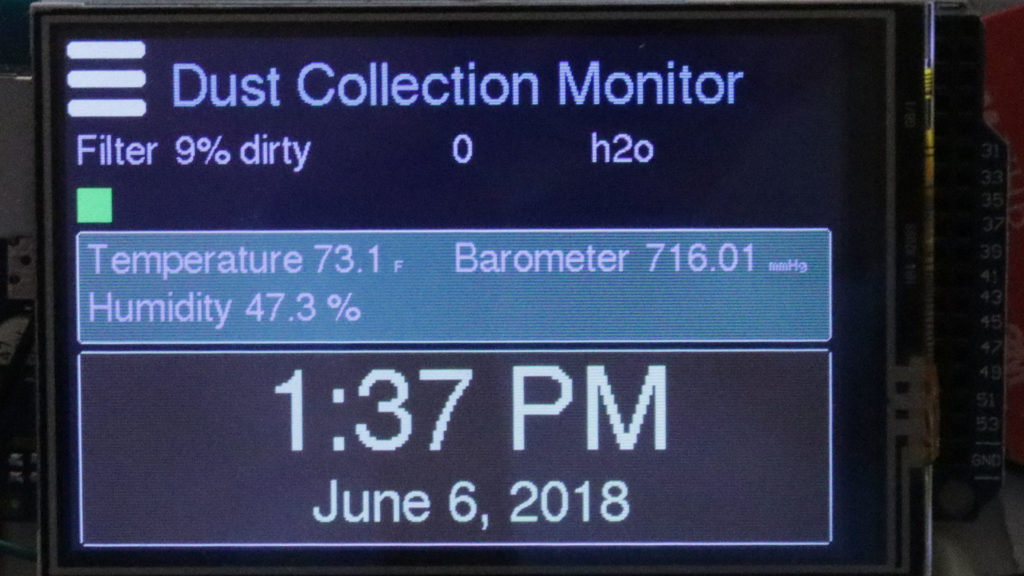
Dust Collection Monitor

I just finished and published my first product – the Arduino Shop Dust Collection Monitor. This was a fun project for me. The display tells me when to clean the cartridge filter in my dust collector.

The Dust Collection Monitor measures the pressure build up inside the cartridge filter. When the collector is on the filter pressure is displayed, which increases as the filter gets clogged with sawdust. When the pressure increases, it can help tell when it is time to clean the filter.

The monitor was built fairly cheaply using an Arduino. The monitor is hooked to the Internet, and can get and display the time, the temperature, humidity and barometric pressure in the shop. The dust collector motor tracks runtime in hours since the filter was last cleaned, since the filter was new, and a total for the dust collector itself.

To check it out – see my full article!

Dust Collection Overview

I want to go over my dust collection system, and explain some of the tips and tricks that I know of. Dust collection is for a couple reasons. One: to get a lot of the sawdust and chips collected without making a mess over the shop. Two: to try to reduce the amount of dust in the air for you to breath.  Wood dust in the air is really bad for your lungs, especially the smaller particles. Also, you can get wood dust allergies, which would be bad if it made it so you couldn’t enjoy your hobby, or how you make your living.

Continue reading “Dust Collection Overview”

Making a crosscut sled

I looked all around online at the different cross cut sleds that people were making. I really liked the Nick Ferry video, his sled really looked awesome, and he explained how to make it really well. I went ahead and purchased his plans as well. You can also check out his plans here: https://nickferry.com/product/table-saw-cross-cut-miter-sled/

Here’s a link to Nick’s how to make video:  https://www.youtube.com/watch?v=ZtwK9X8o1Gw

Continue reading “Making a crosscut sled”

Squaring your Squares

I’m going to go over how to check your squares, and how to fix them so they are square. This will be for a framing square and a combination square.

Also, check out the accompanying YouTube video:

You start by using a piece of plywood with one good edge. Either the factory edge that was cut when you bought it, or one you cut with your table saw. If you don’t want to make marks on the plywood, tape a piece of paper to it, and mark on the paper. Lay the short edge of the square along the plywood, draw a mark the entire length of the square. Flip the square over, and move it about 1/16″ of an inch away from the other line, and draw a second line. These lines should be parallel. You will see from the video above, that for a framing square, you can use a center punch and if your square is less than 90 degrees, hit the inside corner, if your square is more than 90 degrees, hit the outside corner with the center punch (hard), on a metal vise. This spreads the metal out ever so slightly and will move the angle of your square slightly. Be sure and check it again on the plywood, again making two marks with the pencil. See if you need to do it again. You can make several punches in a small area to spread the metal more and more if needed. Make sure and don’t go too far. Also don’t get too close to the edge, or you may mess up the straight edge, and you’d need to file that down.

Continue reading “Squaring your Squares”