

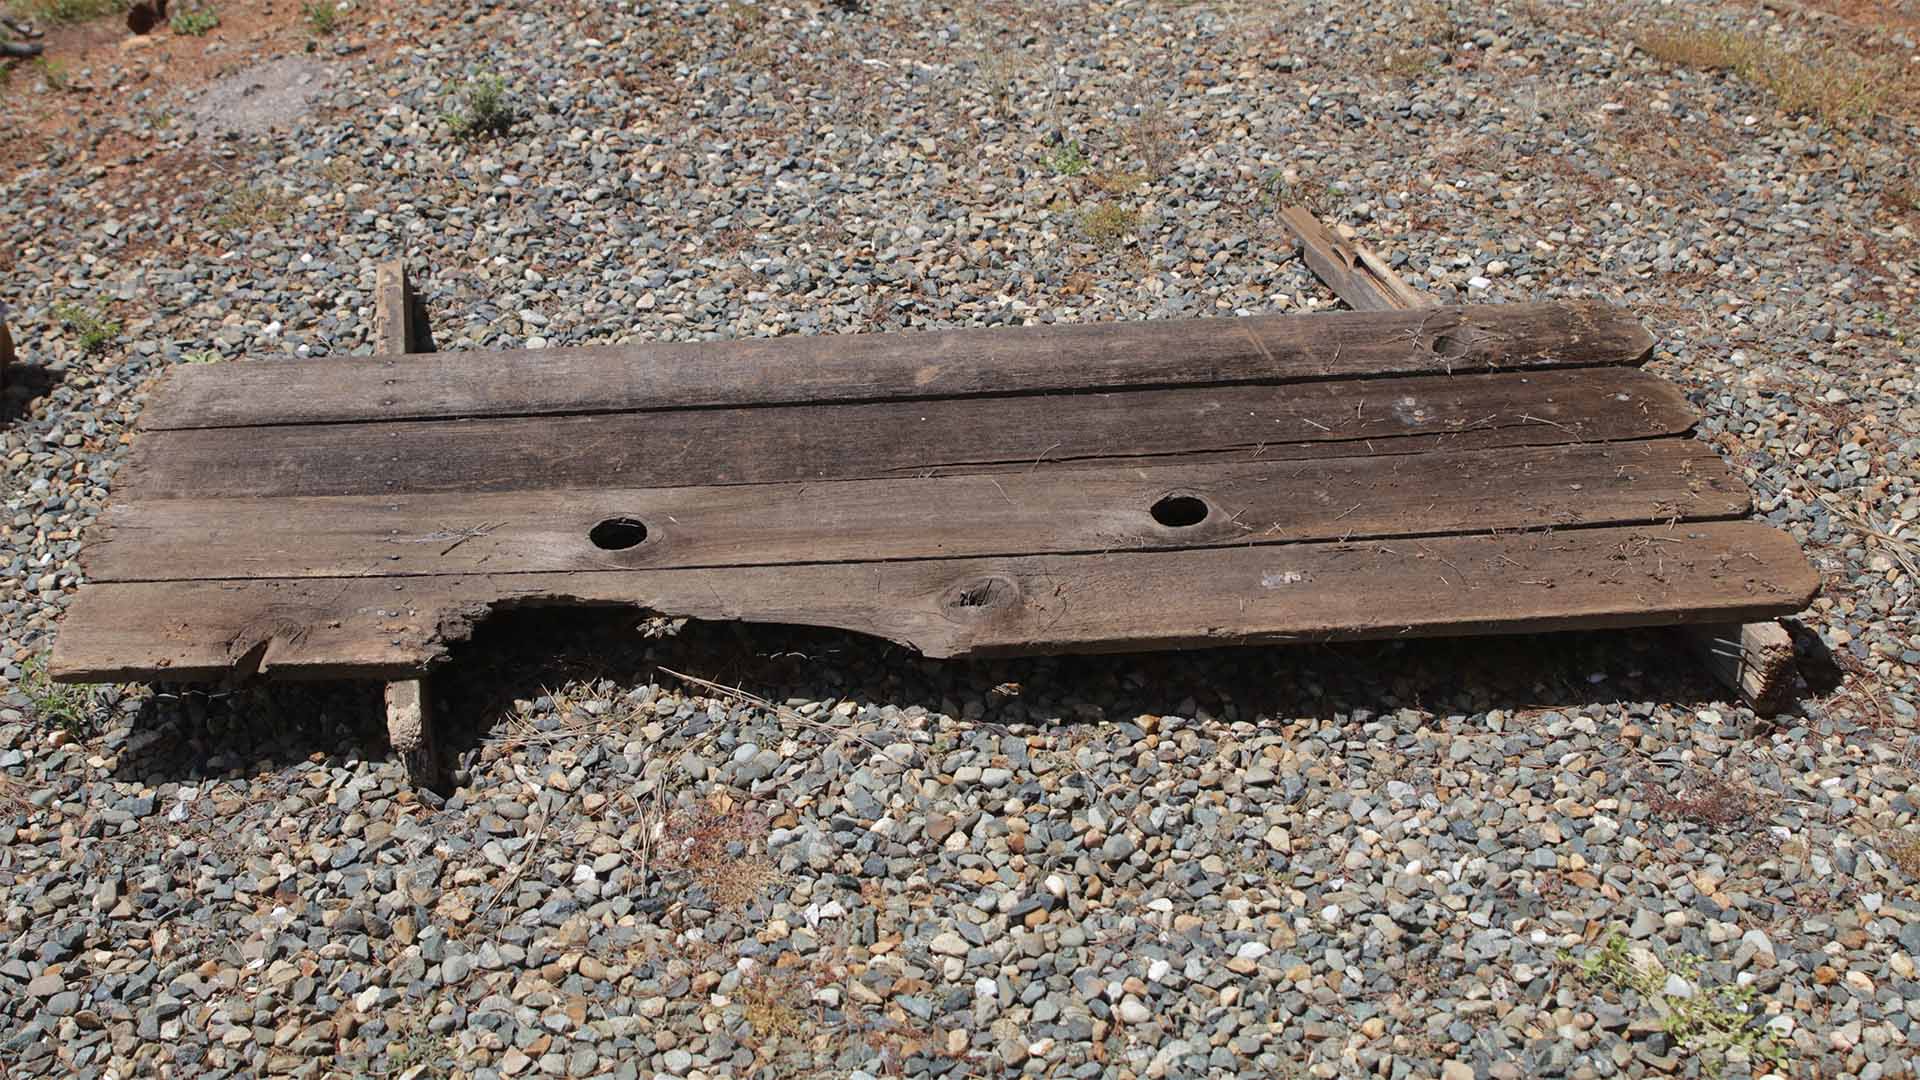
After seeing a blue jay tear up the nest of some house finches, I decided to build a few bird houses, so maybe the house finches could have better luck in the future. I had some old lumber I got to use in the woodstove, and remembered some fence boards in the pile, so I went and got those. It looked like a future bird house to me!
I did a bit of research on bird houses. I found the oak titmouse needs about a 1.25″ hole, and a house finch needs about a 1.5″ entry hole. The house should be about 5 to 6″, and maybe 8 to 9″ tall. Do a little research for the types of birds you have. I also let the fence boards dictate the dimensions somewhat. I put a 10 degree tilt on it for the roof. The articles said not to put a perch or dowel under the entry hole, as this just gives the predators something to hold onto when trying to get in. The nesting birds can easily get in without a perch. Also they said to put some small holes up near the top for ventilation, and some in the bottom too. I tilted all these holes upwards, so water would tend to want to run out.
I used Titebond III waterproof glue, and 1.25″ screws that won’t rust to make the bird house. I’ve never used the Titebond III waterproof glue for an outside project before, so for me, this will be a bit of an experiment to see how that holds up over the years.
First of all, I carefully checked for nails. I don’t need a nail ruining my day in my SawStop saw. Activating the brake accidentally would be a costly mistake. Then I cleaned up the edges so when I made it, they would glue together well. That was my first mistake; I should have only cleaned the edges of the front and back pieces. I ended up putting rabbets in the sides, and could have left those edges as they were.
I didn’t really plan exact sizes for anything, and just cut pieces to whatever length, keeping in mind the 5-6″ dimensions for width and length, and 8 to 9″ tall. The top of the front and back pieces are beveled at 10 degrees, for the roof which is at a 10 degree angle. I started by cutting the sides with the top at a 10 degree angle, then used that piece to determine the heights for the front and back pieces.
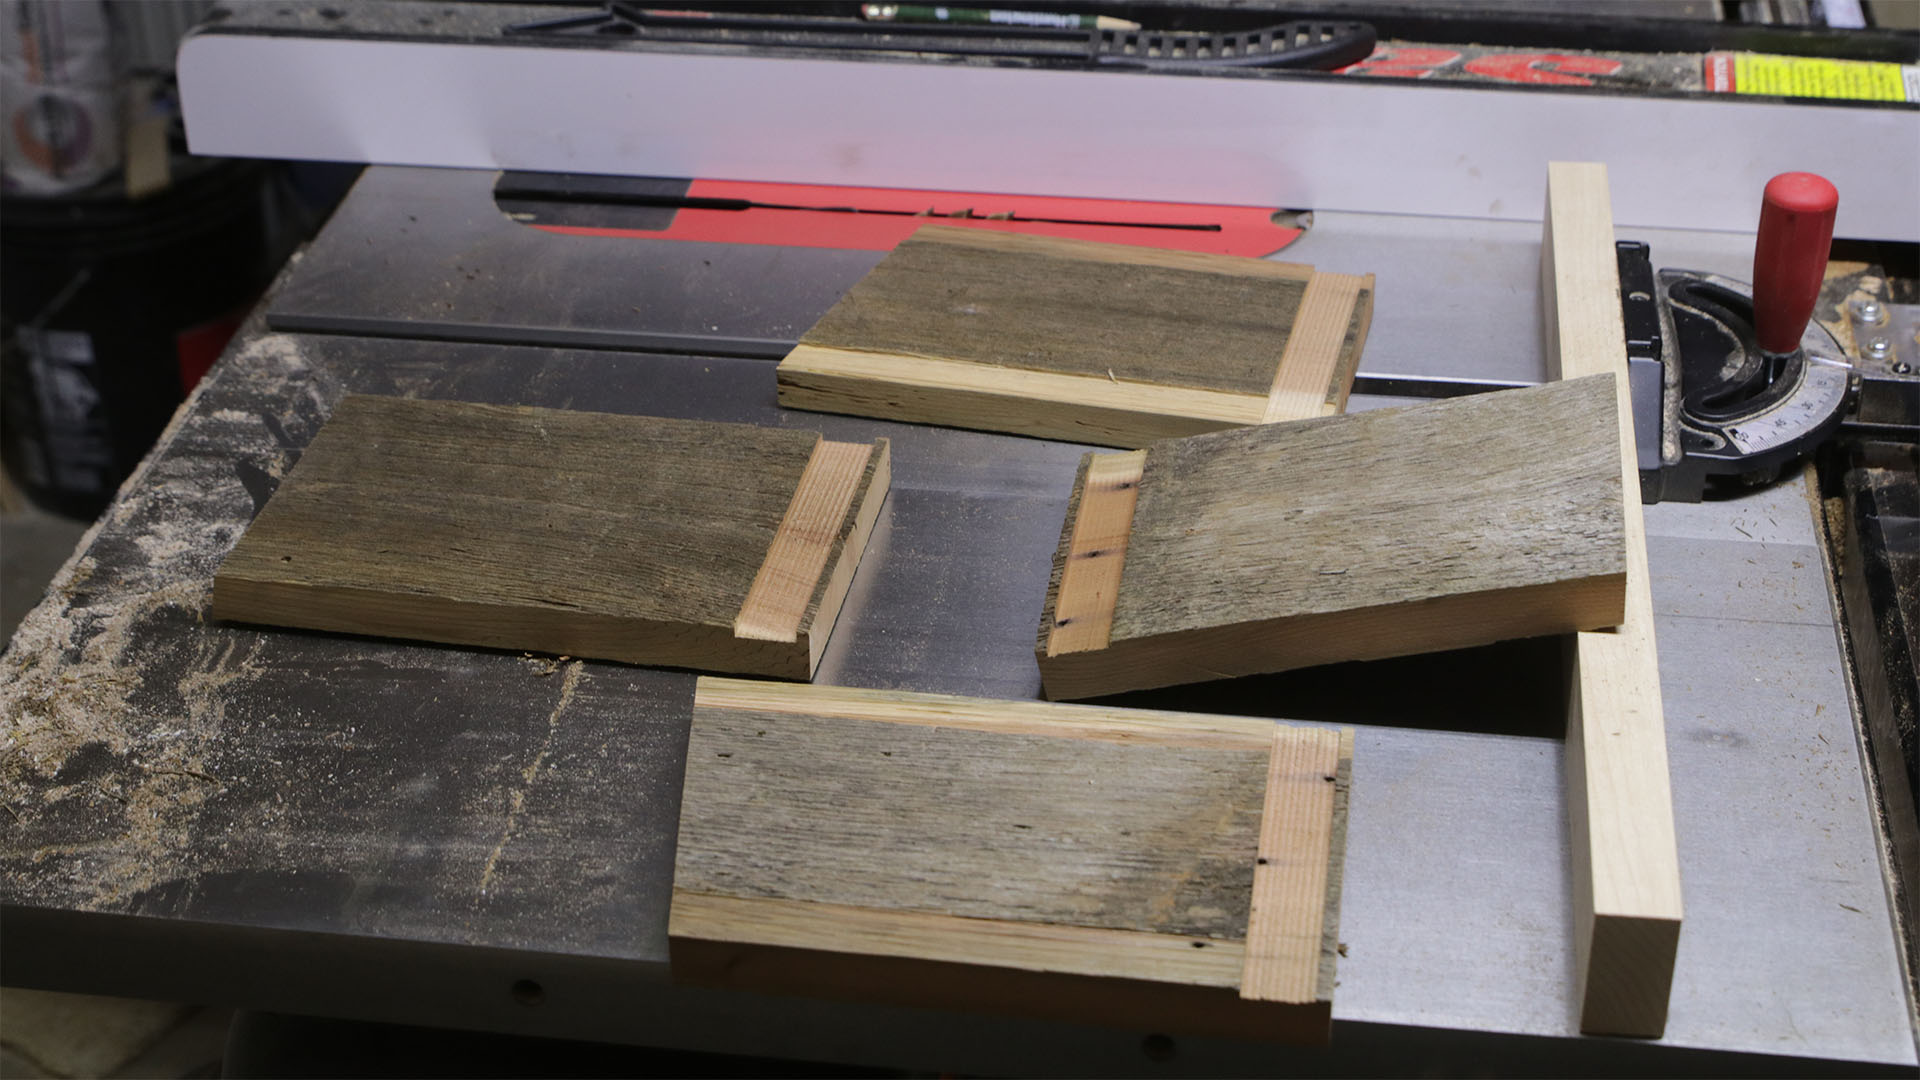
When cutting the pieces out, I tried to make it so any nail holes from the old fence were in places where it wouldn’t matter, very near the bottom , or right up under the roof piece. Notice above the nail holes are across the dado for the bottom piece. The birds won’t get wet from those.

In the image above, the front piece is just sitting there, not glued, to help keep it square. The front piece is removable so the old nests can be cleaned out. I just screwed the front piece on by the sides to hold it in place. I’ll drill the entry hole in later. After this dried, I drilled countersink holes in the sides, and put screws in.
I mounted two narrow boards on the back that I attached screws to the top for putting a wire around and hanging it from a branch. Each of those boards has a small dado in it, so it will fit around the roof overhang (which I kept minimal in the back of the house).
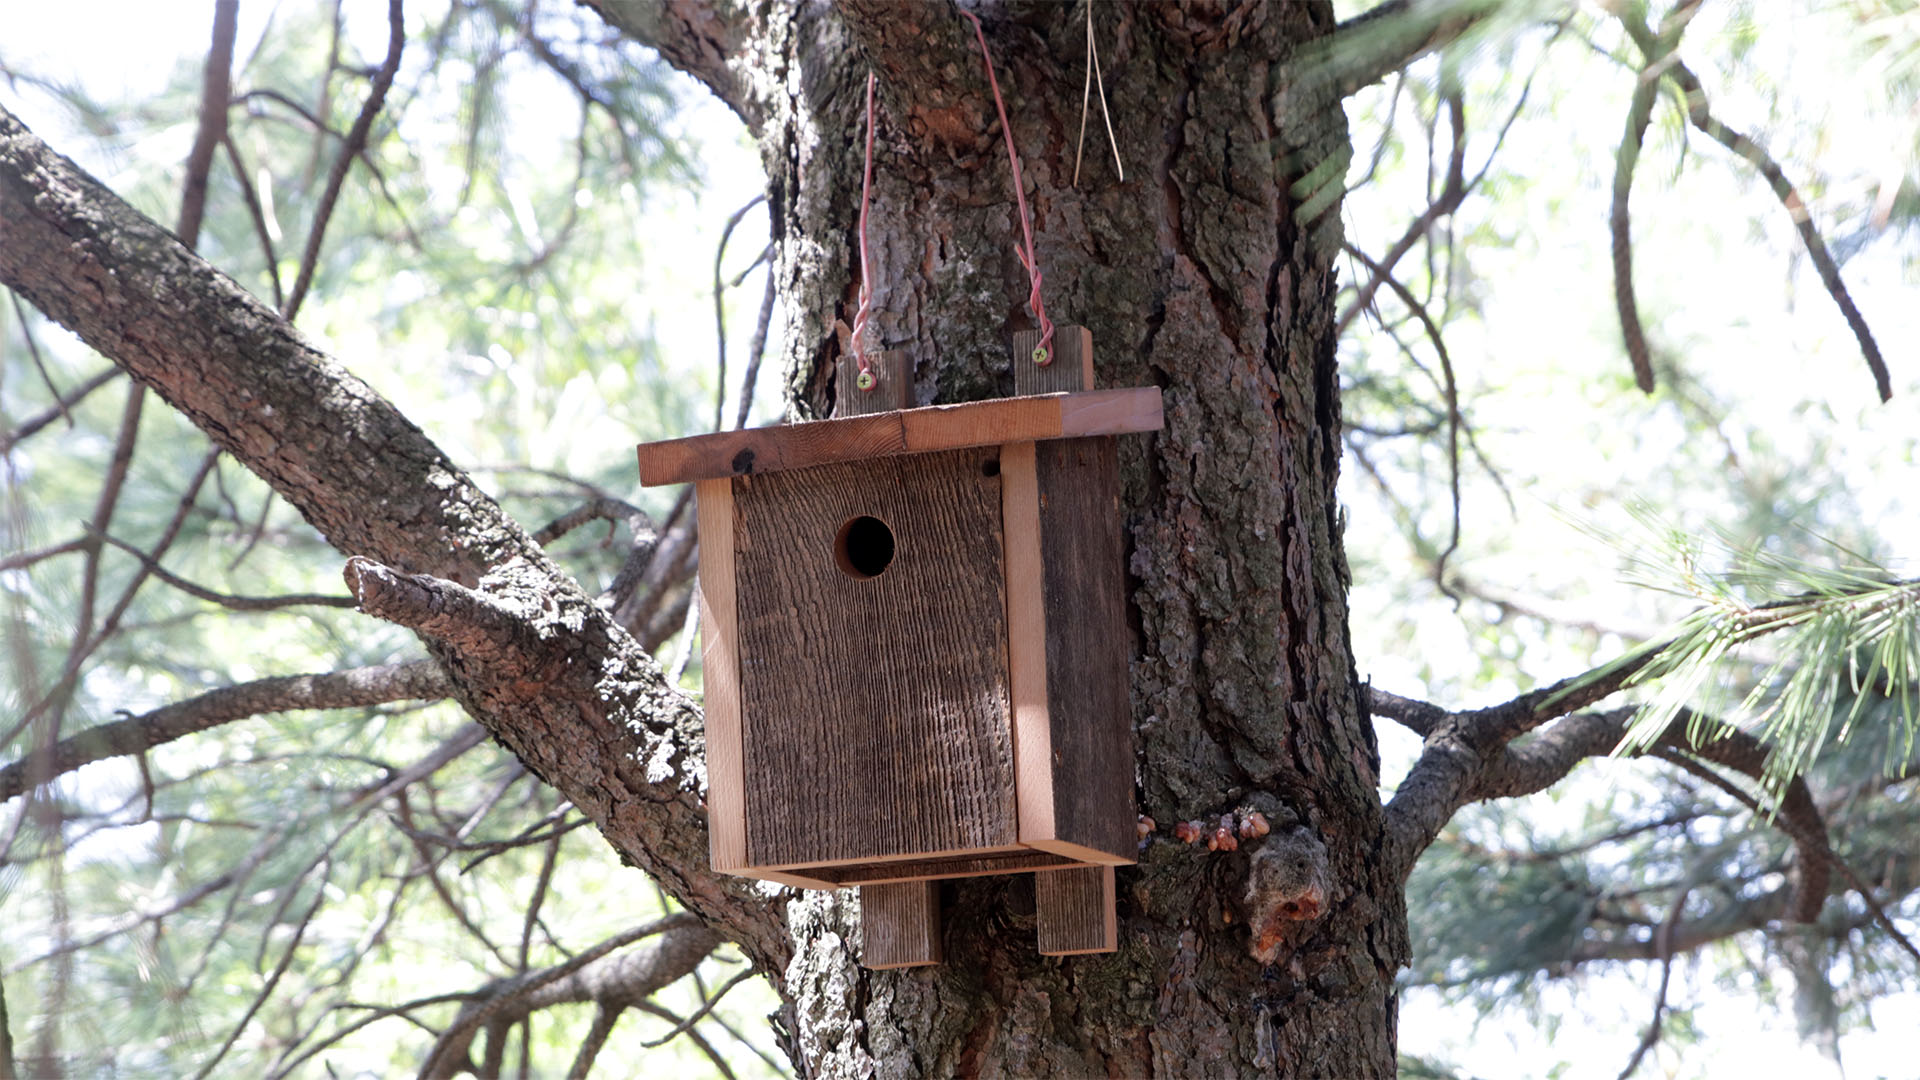
I ended up just gluing the tops on, after I chiseled a shallow dado for the sides to fit in. This dado will let any water running along the bottom edge of the top to not be able to run into the inside of the birdhouse. Should I have also screwed the tops on? I don’t know. Another experiment to find out how that works over the years. I hope the birds are happy! In the past, all birdhouses I’ve ever had are used pretty much every single year, so I expect these to be used soon.
Products used in this build:
1.25″ screws that won’t rust: https://amzn.to/2KTOov0
Titebond III waterproof glue: https://amzn.to/2rErWy5
Countersink drill bits: https://amzn.to/2jRJClB
Forstner bit set: https://amzn.to/2rJWQ7F
Big Tools I use:
Table Saw, SawStop PCS: http://amzn.to/2H3ySLb
SawStop Industrial Mobile base: http://amzn.to/2spo6f6
Overarm dust collector: http://amzn.to/2CdfRlR
SawStop 80 tooth blade: http://amzn.to/2Cenngl
SawStop 40 tooth blade: http://amzn.to/2CdLRXh
SawStop Dado safety cartridge: http://amzn.to/2H8e7ye
DeWalt Dado: http://amzn.to/2CeqLrs
SawStop Cast Iron Extension: http://amzn.to/2Cdtj9s
Bench Dog Router Extension: http://amzn.to/2Bpcbkr
Router: http://amzn.to/2H5YK9v
Router Lift: http://amzn.to/2Ejz3En
Band Saw: http://amzn.to/2Eh9pQG
Smaller Tools I use:
DeWalt Drill/Driver set (very nice!): http://amzn.to/2BpDMC7
Clamps: http://amzn.to/2H6tG9t
Bessey REVO Clamps: http://amzn.to/2CeGEOJ
FastCap Glue Bottle: http://amzn.to/2Cf25z5
Chisel set: http://amzn.to/2EVBUAD
Brad point drill bits: http://www.leevalley.com/us/wood/page.aspx?c=&p=42247&cat=1,180
Forstner Bit Extension: http://amzn.to/2CdxB0r
Bubble Level: http://amzn.to/2Elvr50
Sharpening Stones:
DMT 8″ Course (D8C): http://amzn.to/2hZ8AOO
DMT 8″ Fine (D8F): http://amzn.to/2hY4tCT
DMT 8″ X Fine (D8E): http://amzn.to/2Agtofq
DMT 8″ XX Fine (D8EE): http://amzn.to/2BwMziU
Safety Equipment:
Dewalt safety glasses: http://amzn.to/2Dp5ZpW
Dewalt safety glasses Rx-BiFocal (choose your power): http://amzn.to/2FFV2lw
Dust masks N95: http://amzn.to/2HynRRH
Hearing protection: http://amzn.to/2FPrV3v
Camera Equipment:
80D: http://amzn.to/2EUq5KV
Lens: http://amzn.to/2CdJKCs
GoPro: http://amzn.to/2BnQa5h
Sandpaper:
3M 100: http://amzn.to/2EiI94g
3M 220: http://amzn.to/2H8us5K